It has been a while since we saw a build from this artist… and he hasn’t missed a beat with his build of the Moebius Seaview! Very nicely done!

View more below…
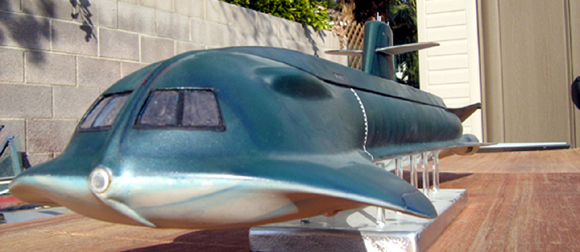
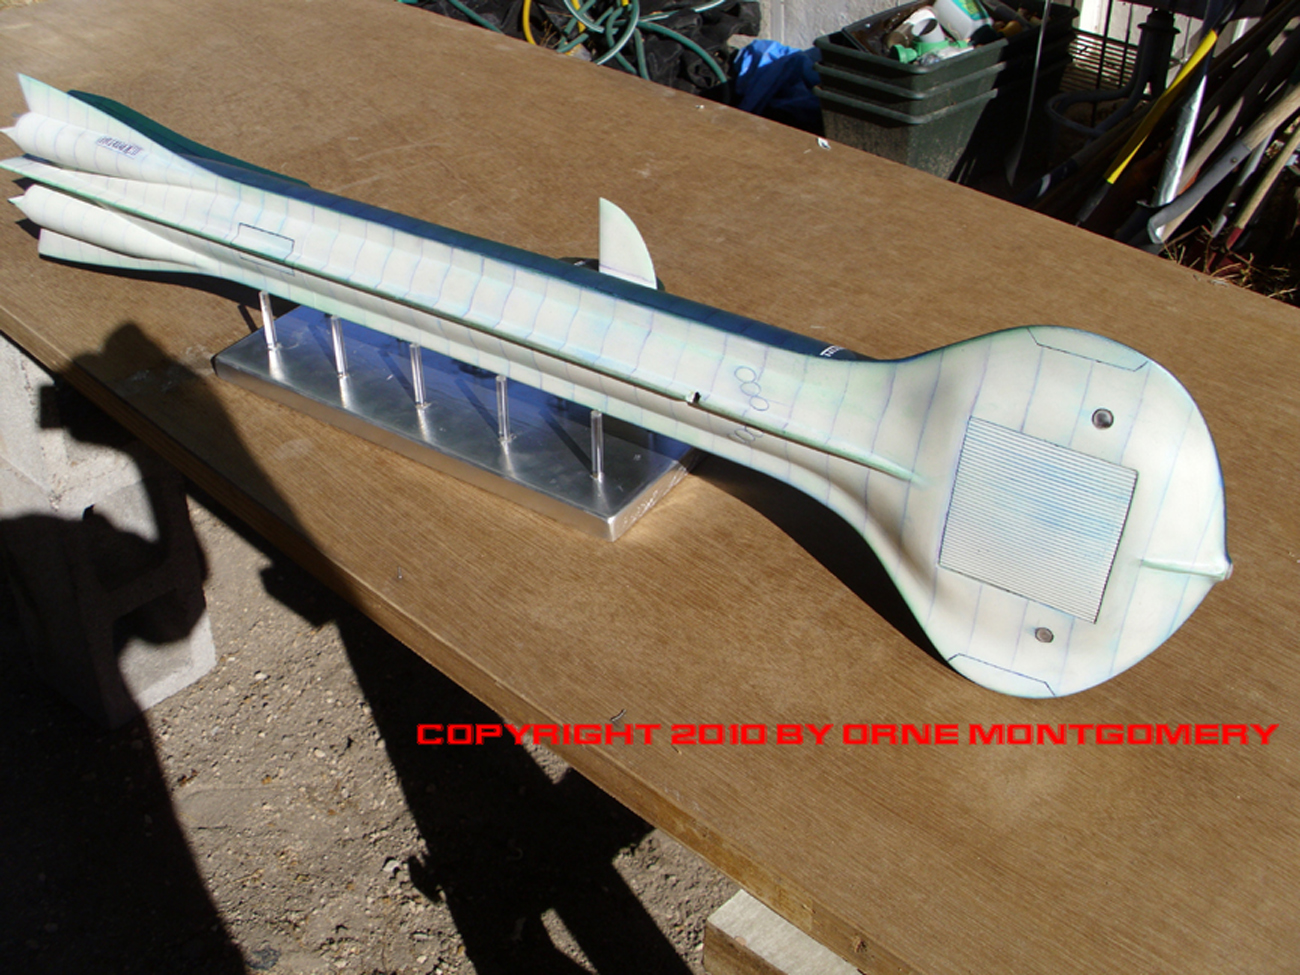
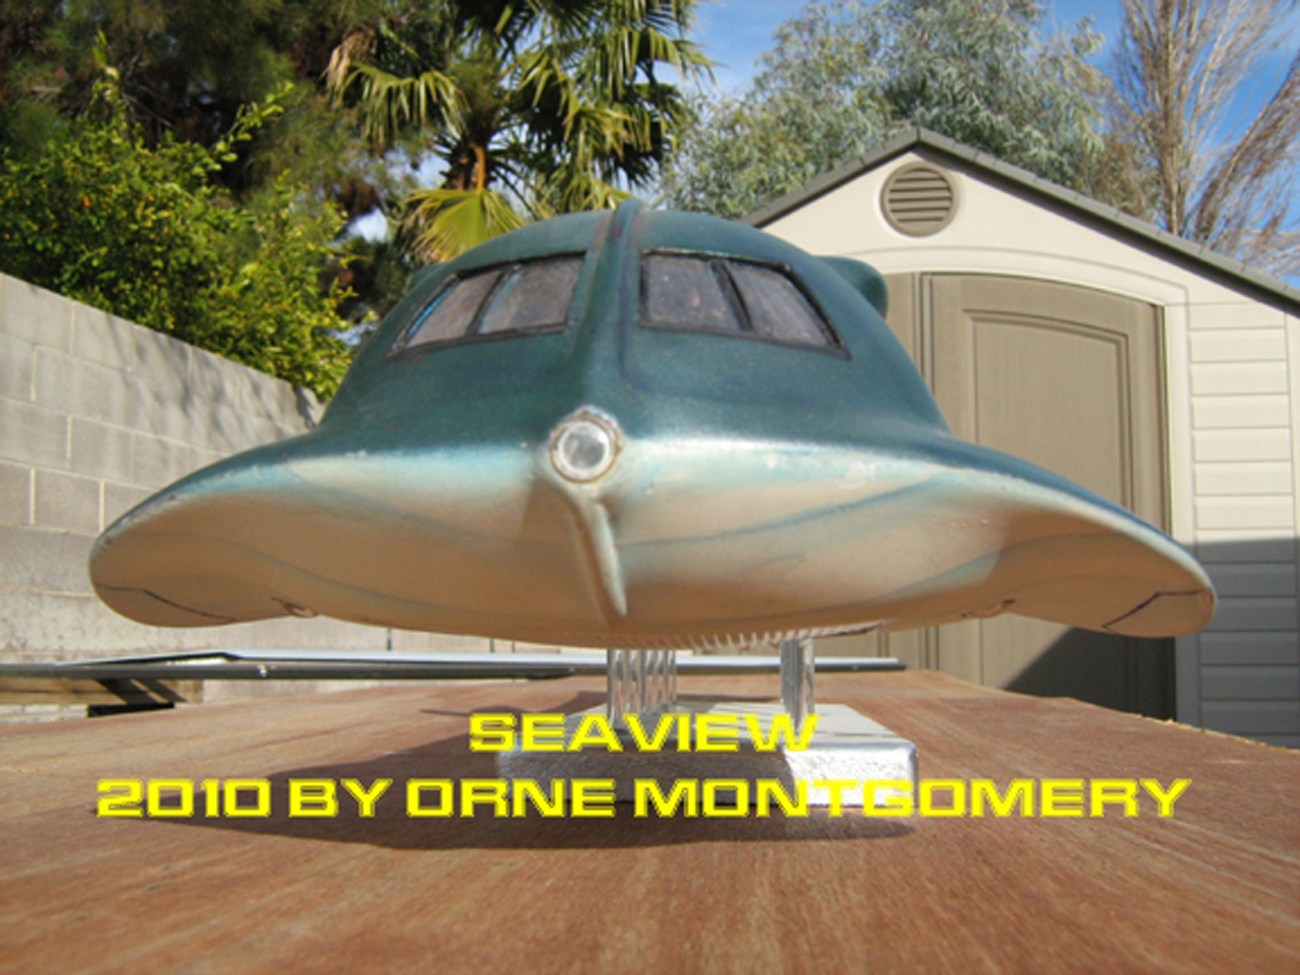
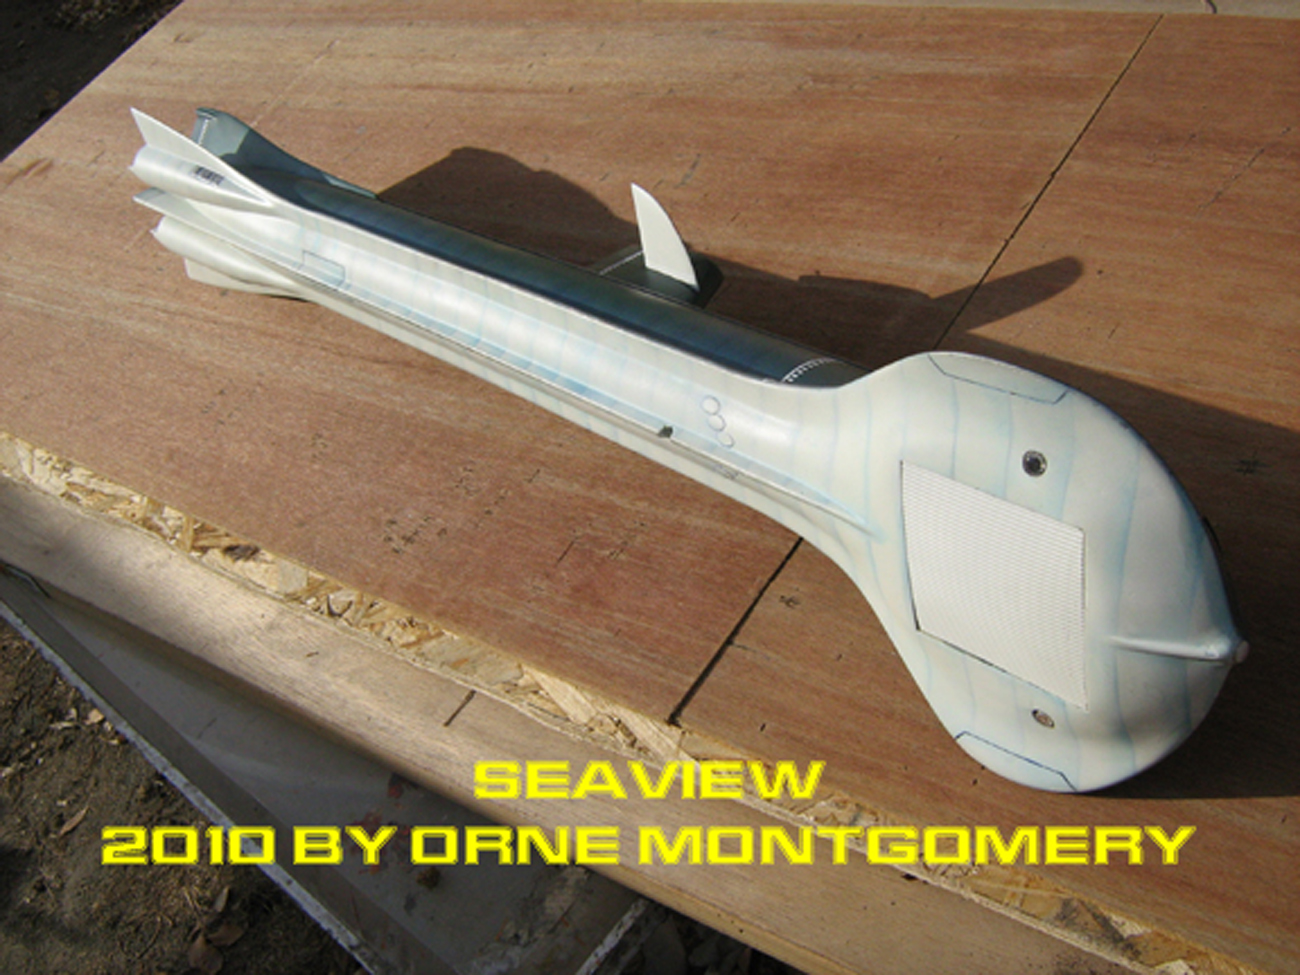
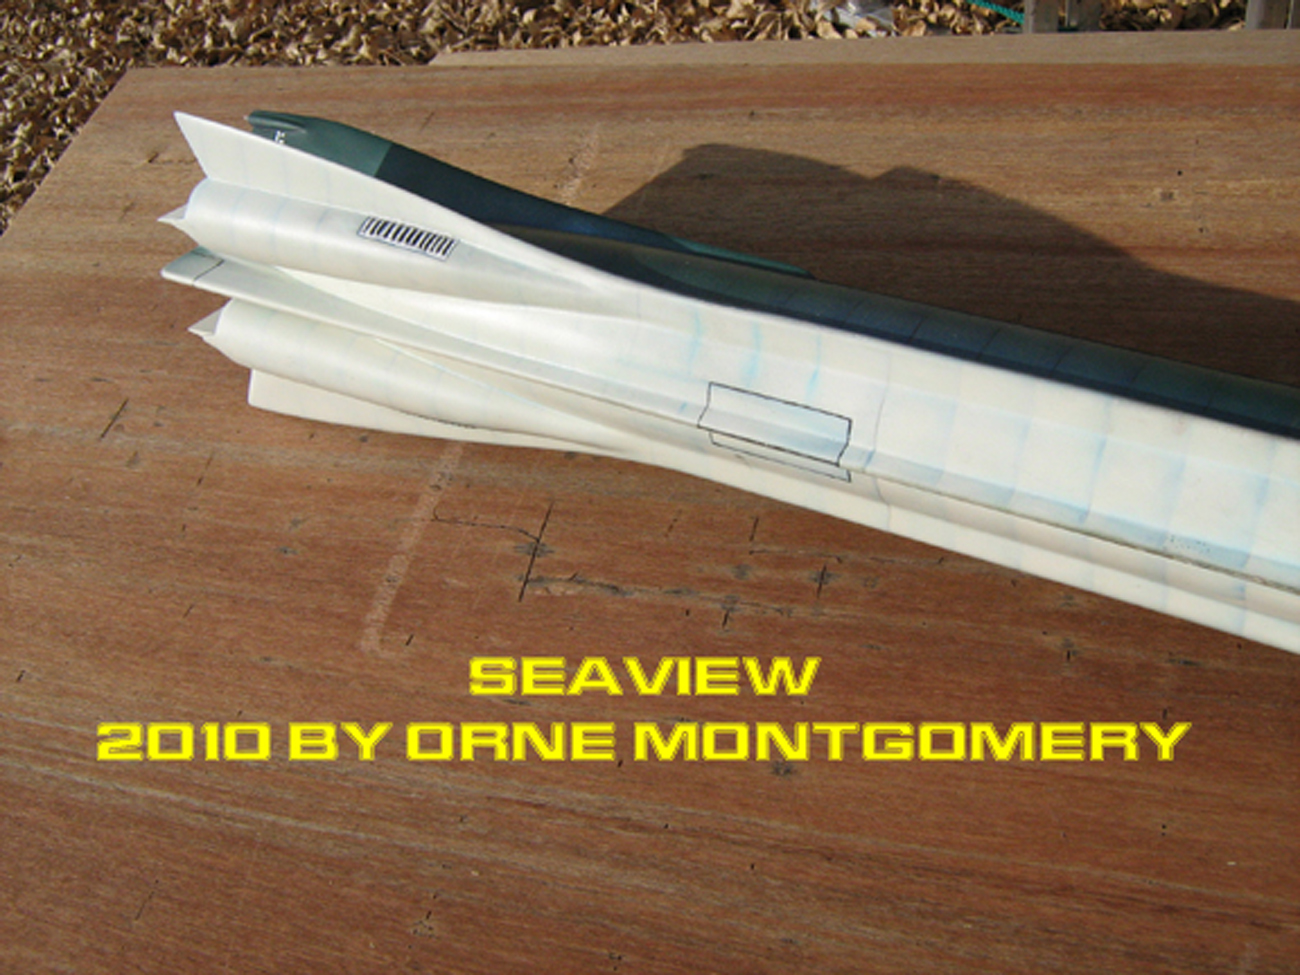
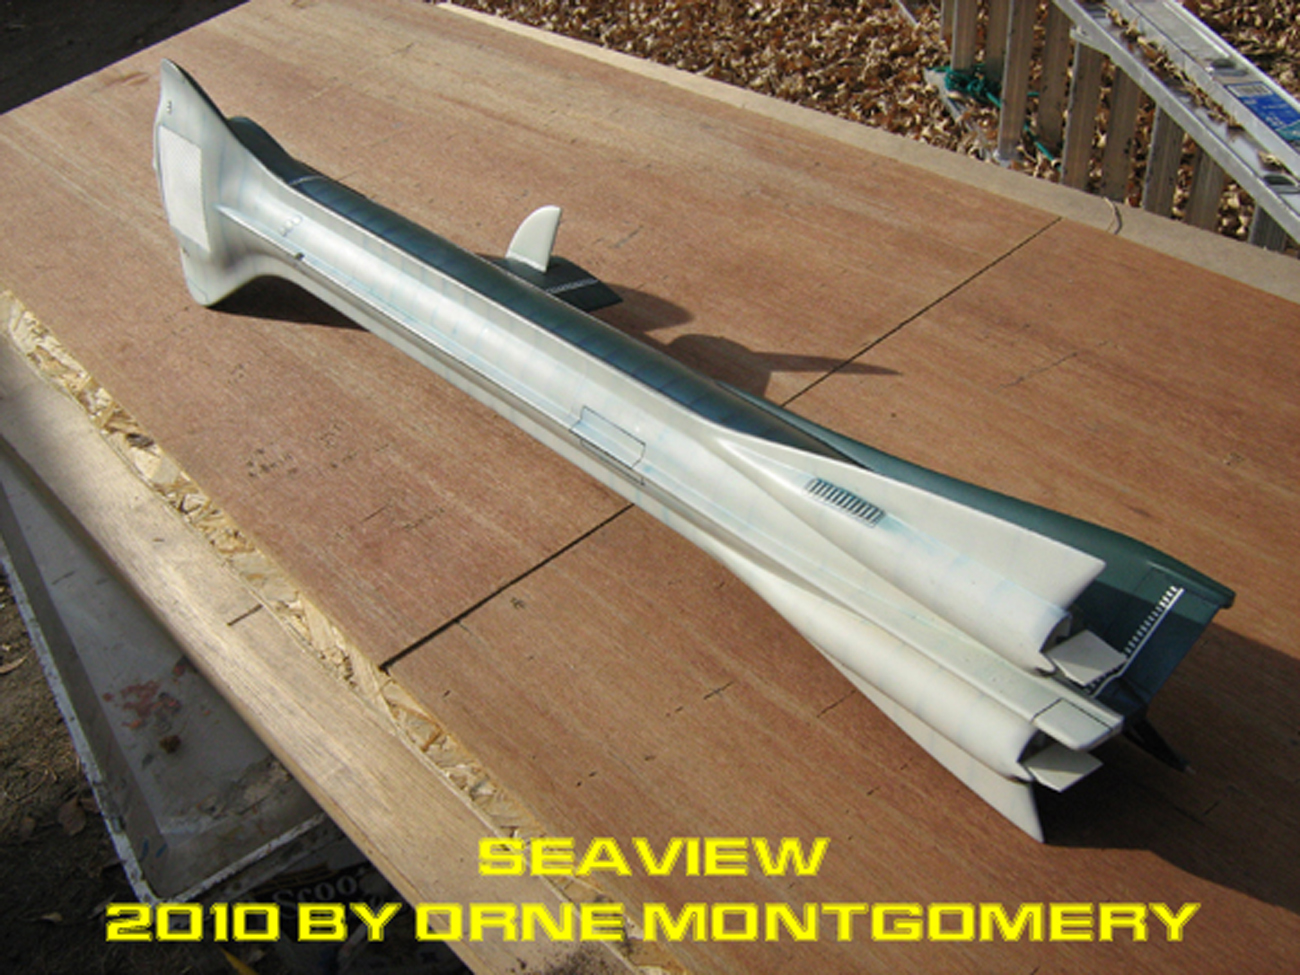
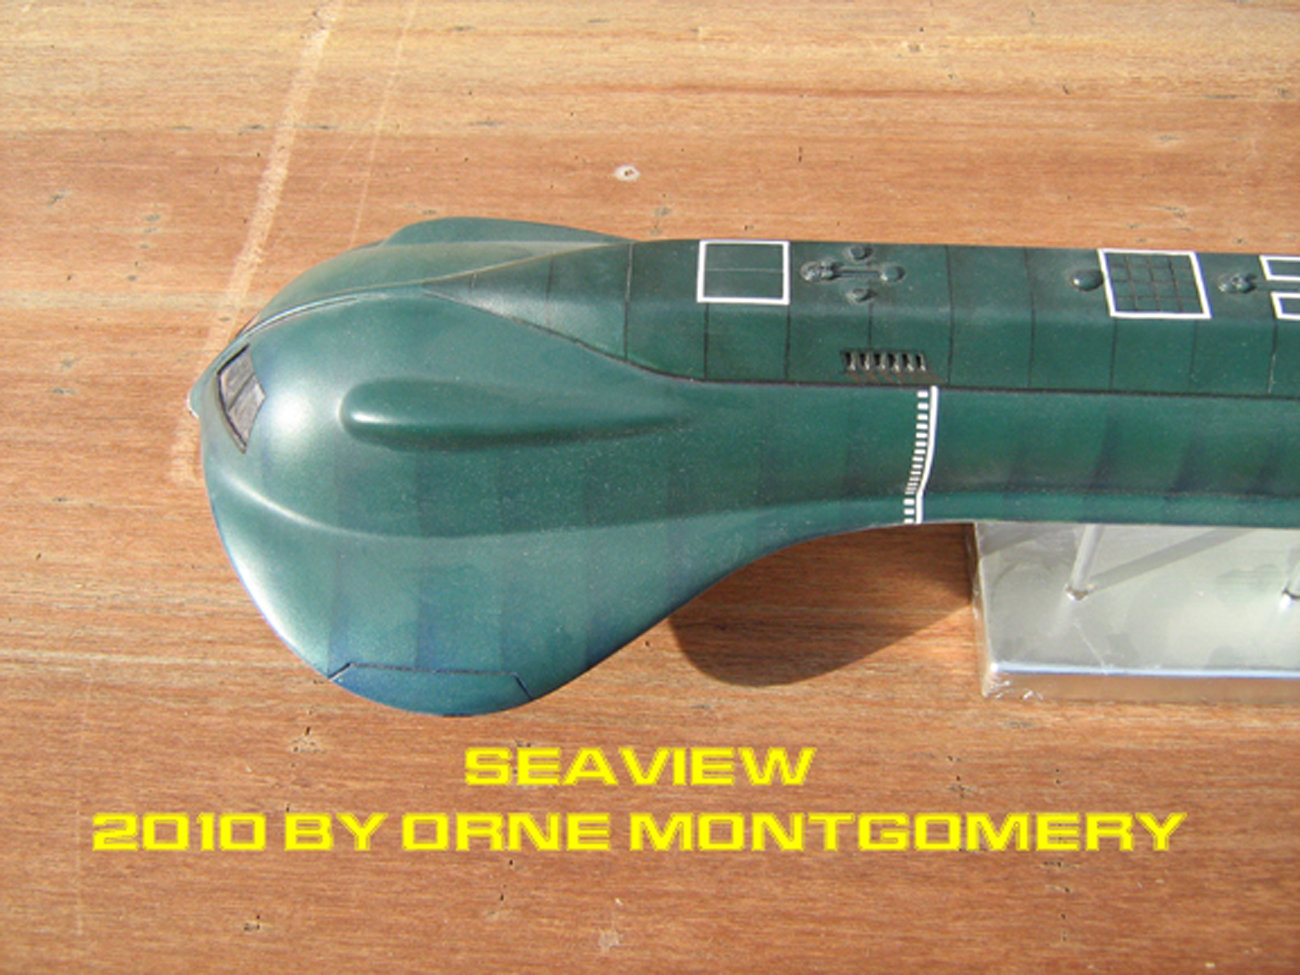
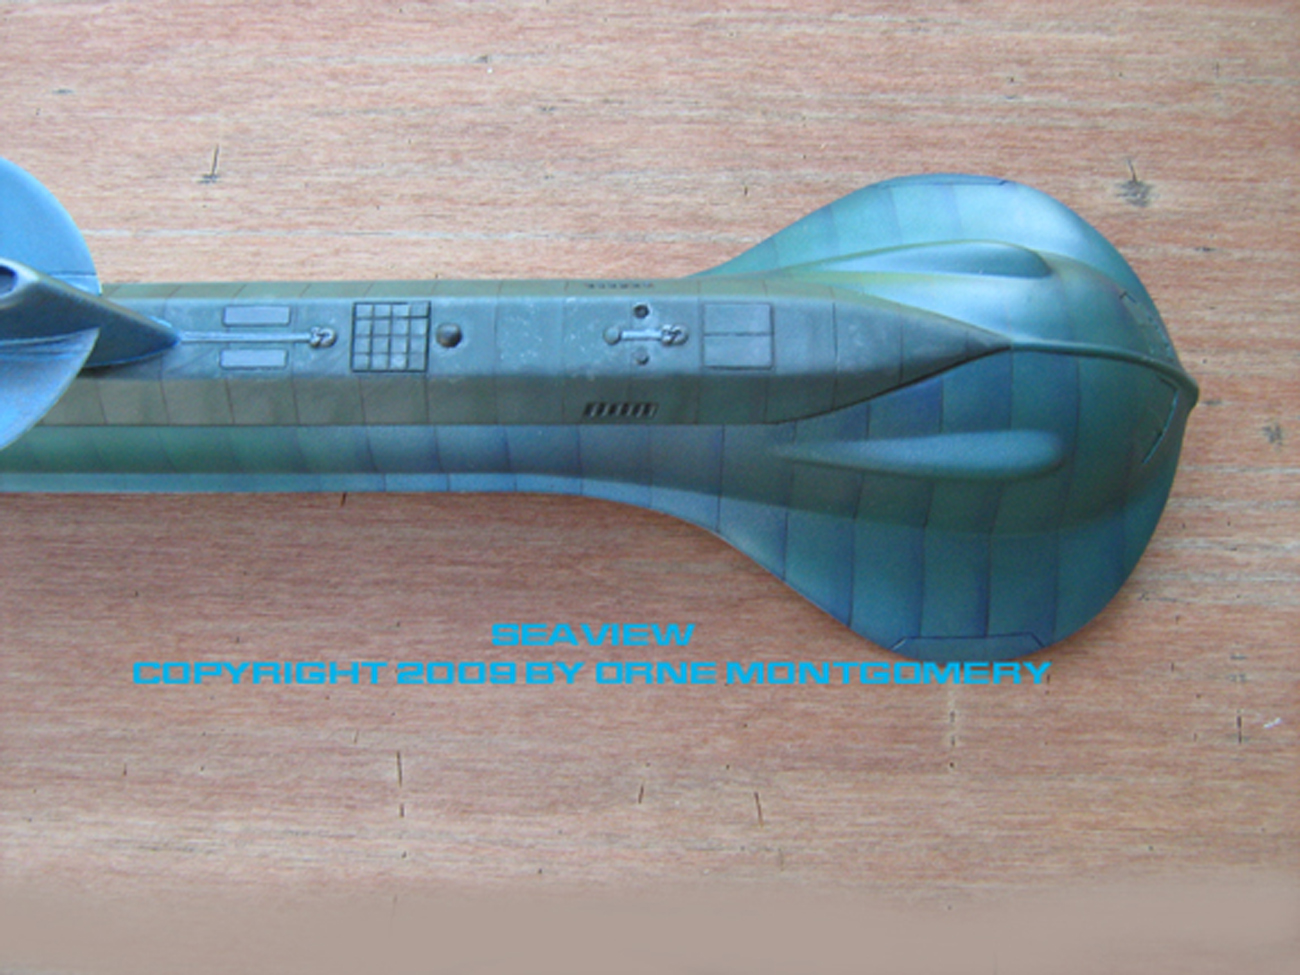
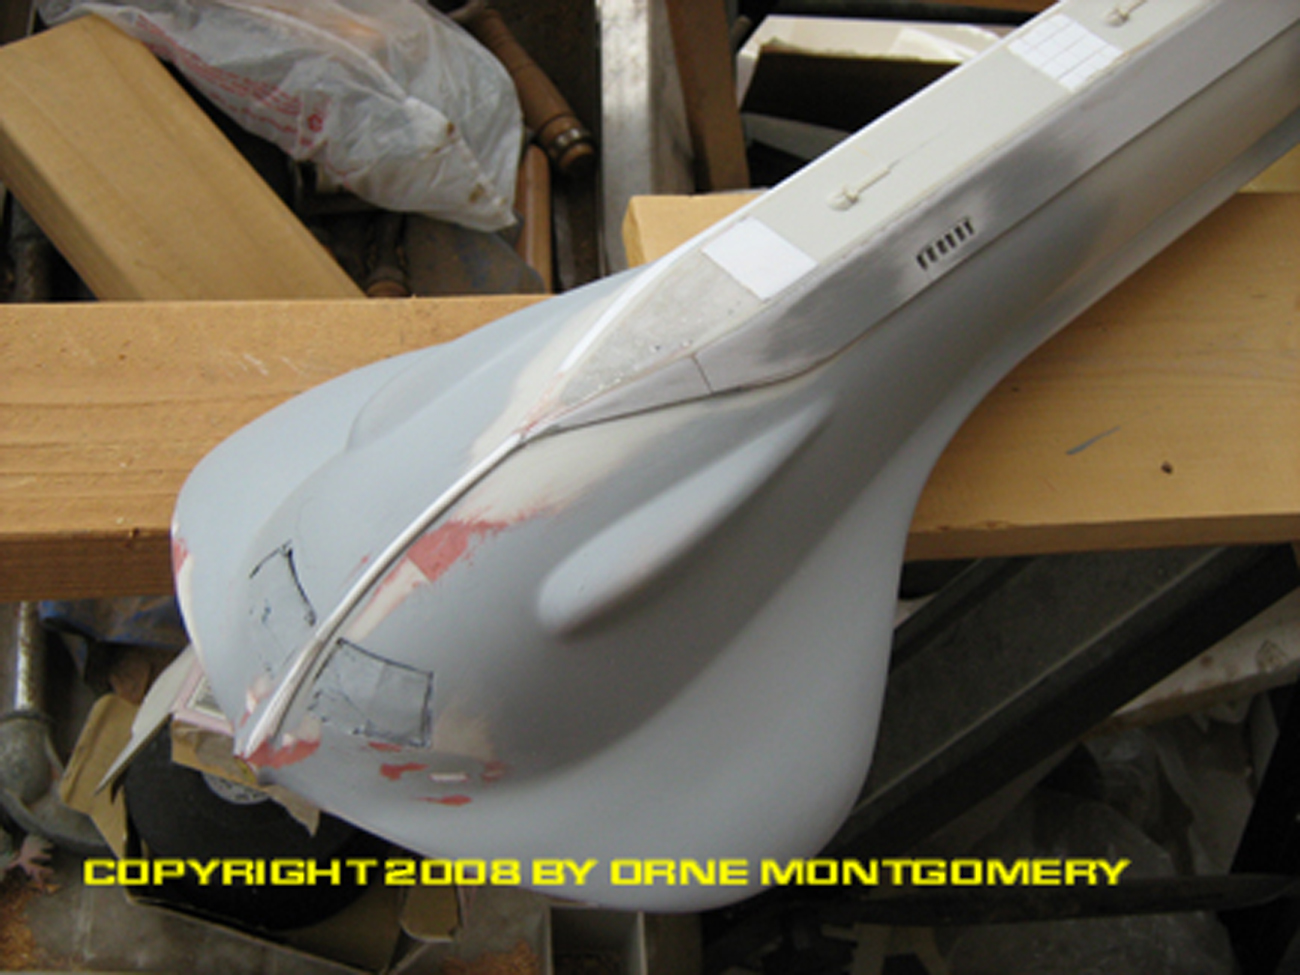
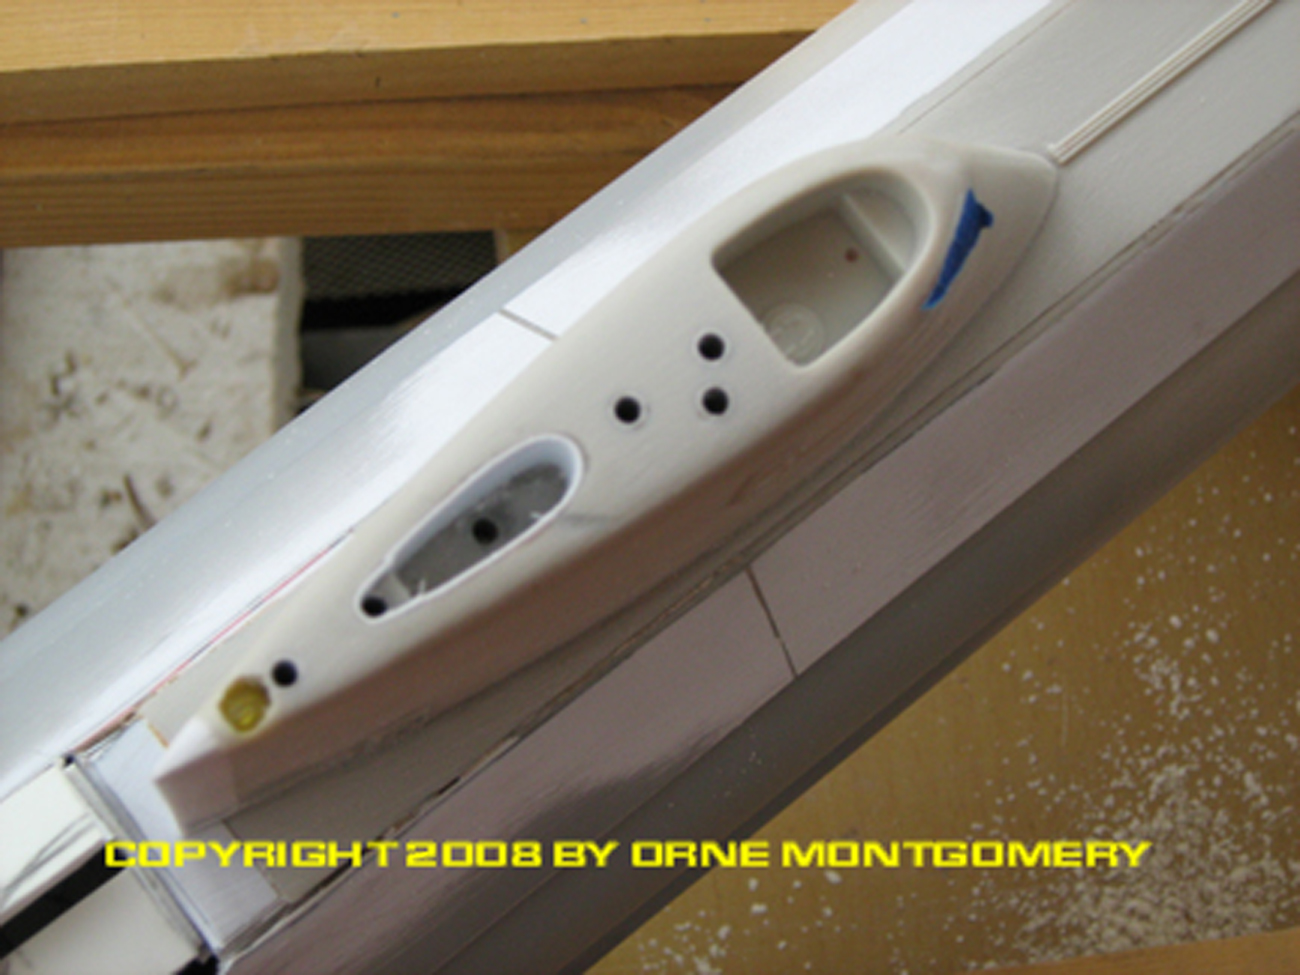
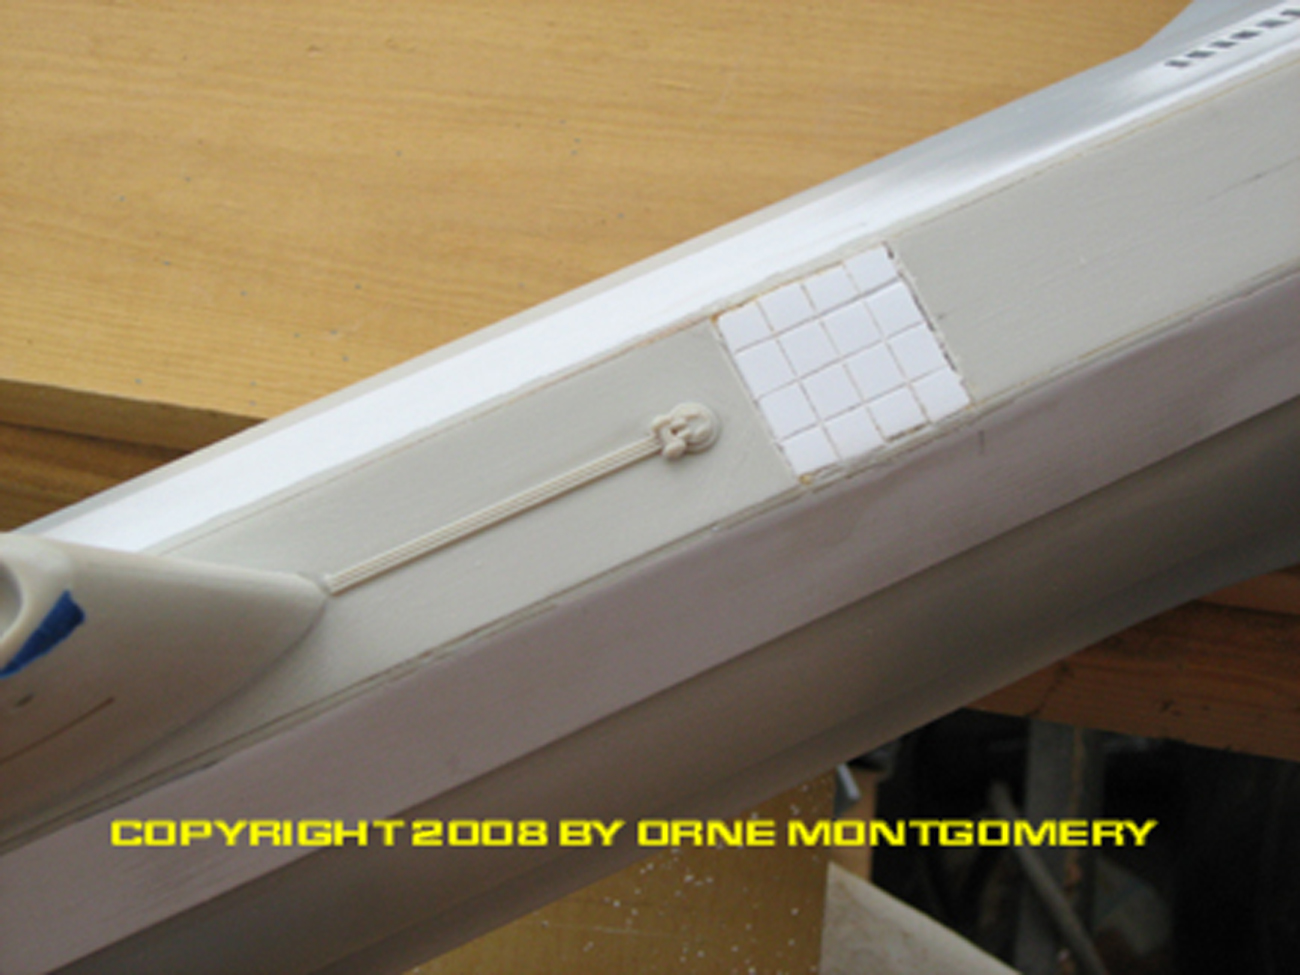
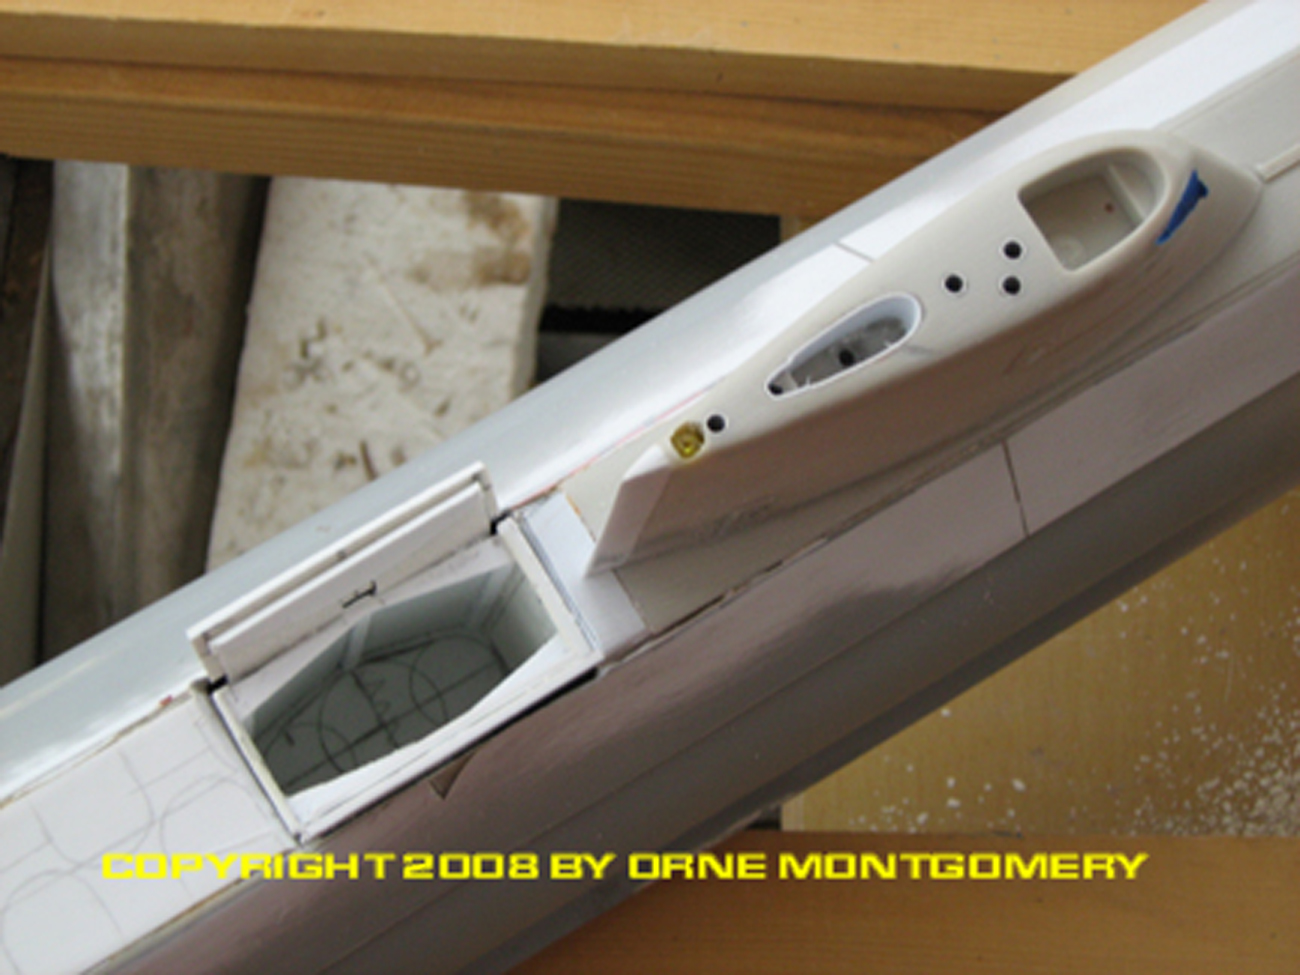
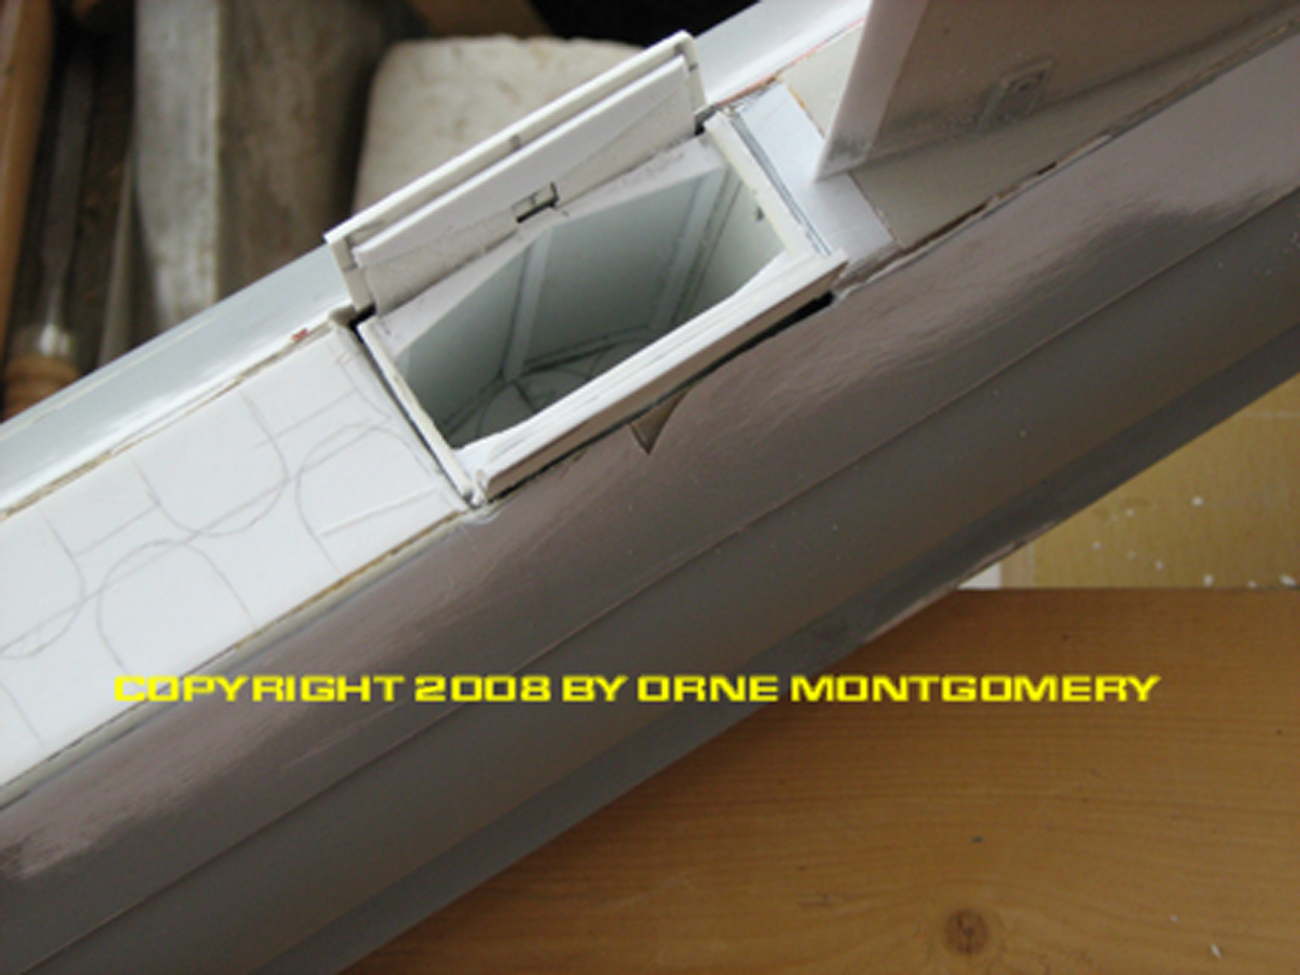
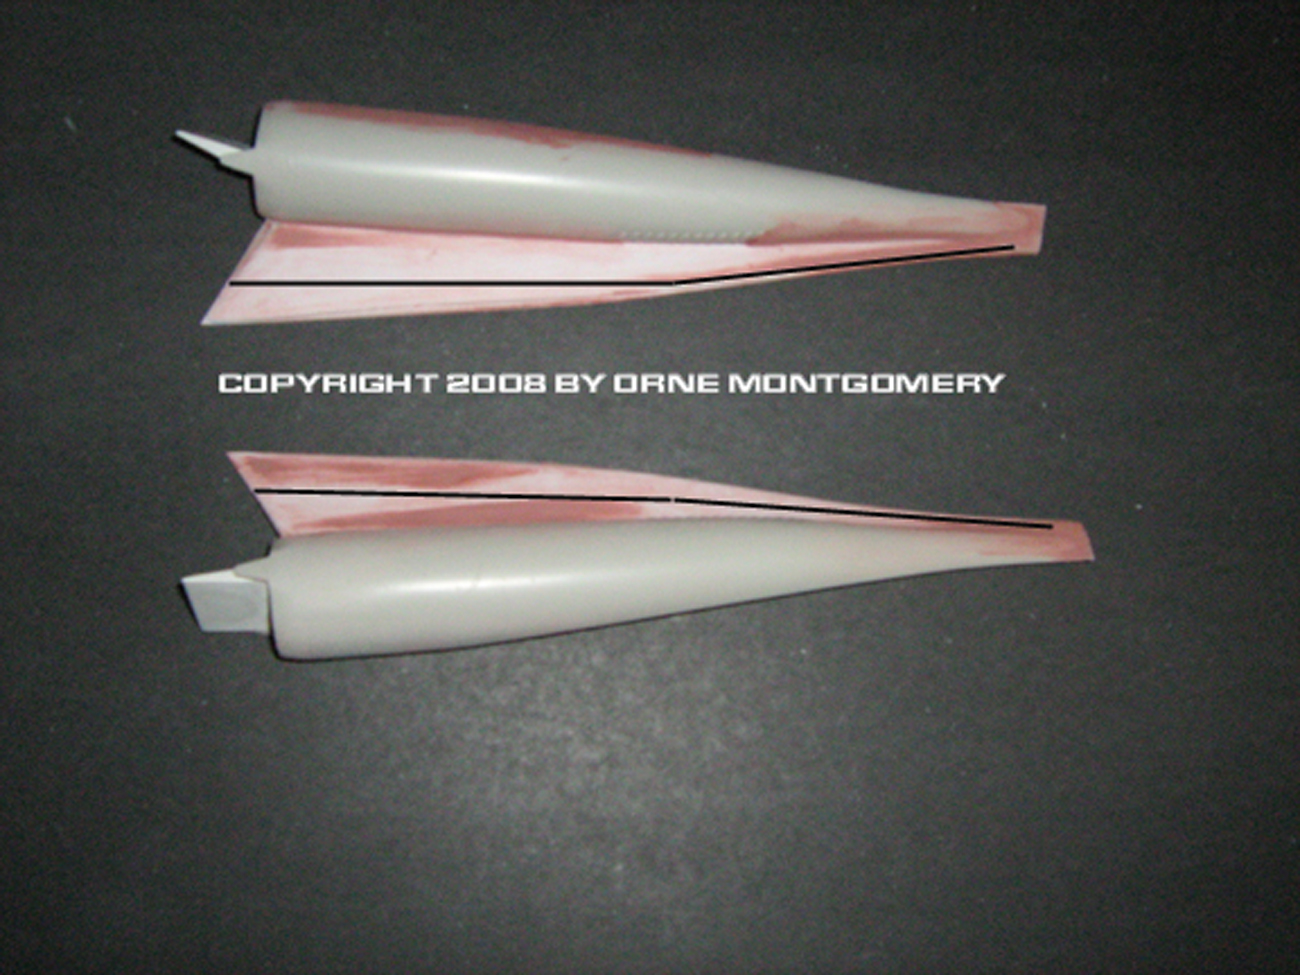
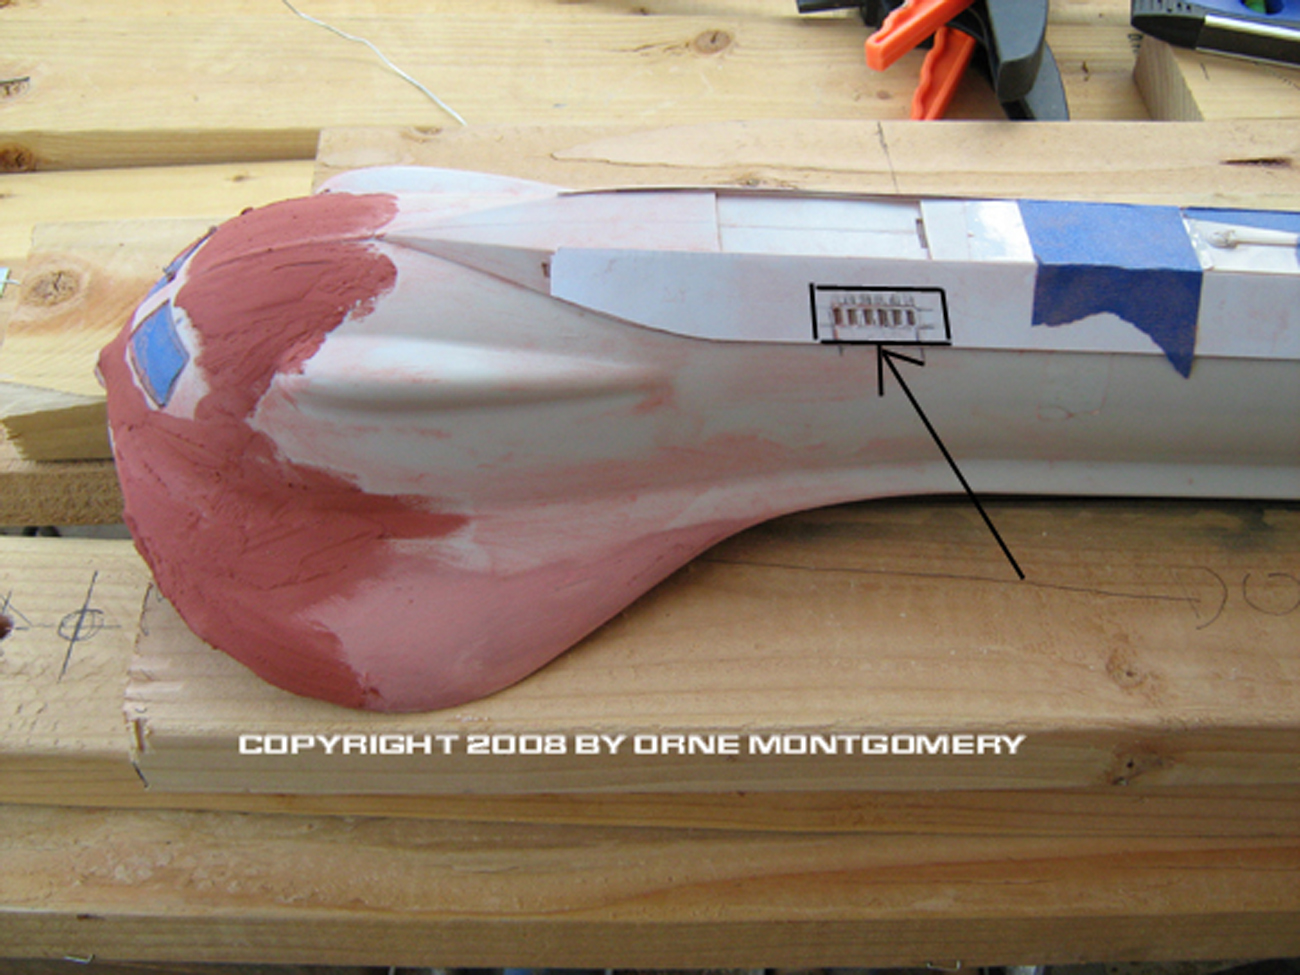
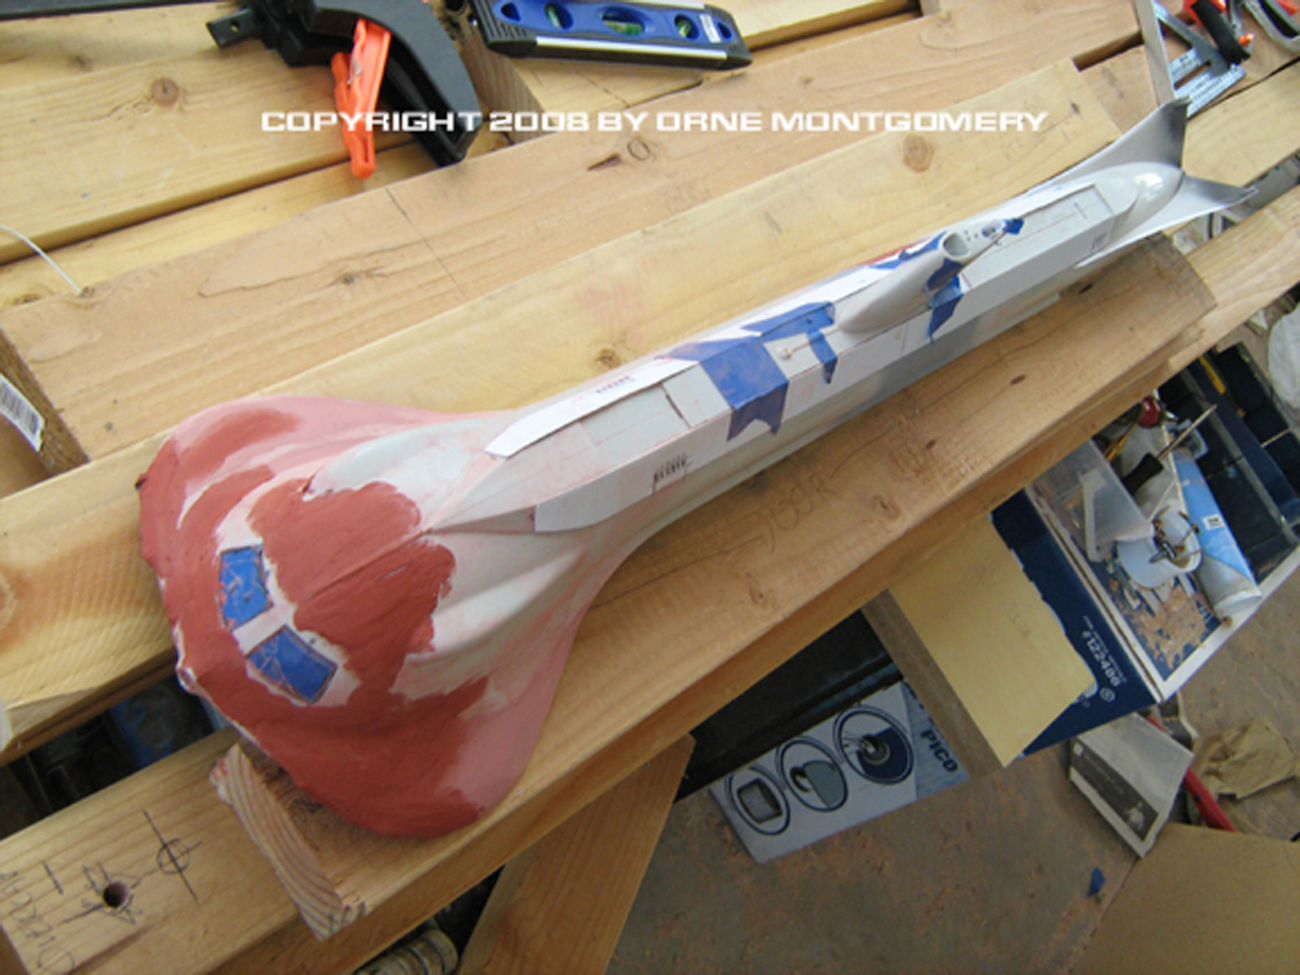
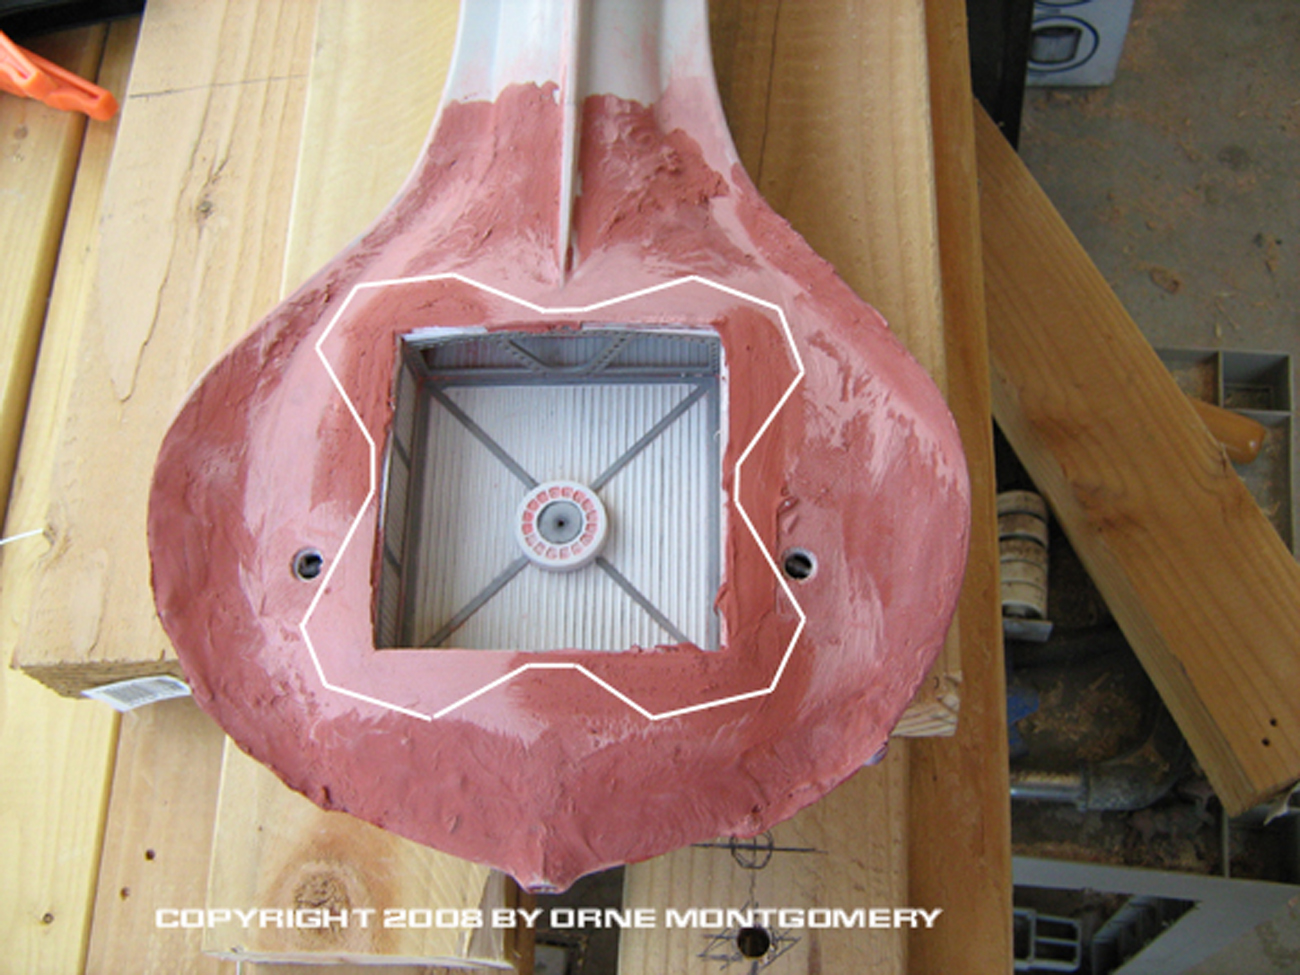
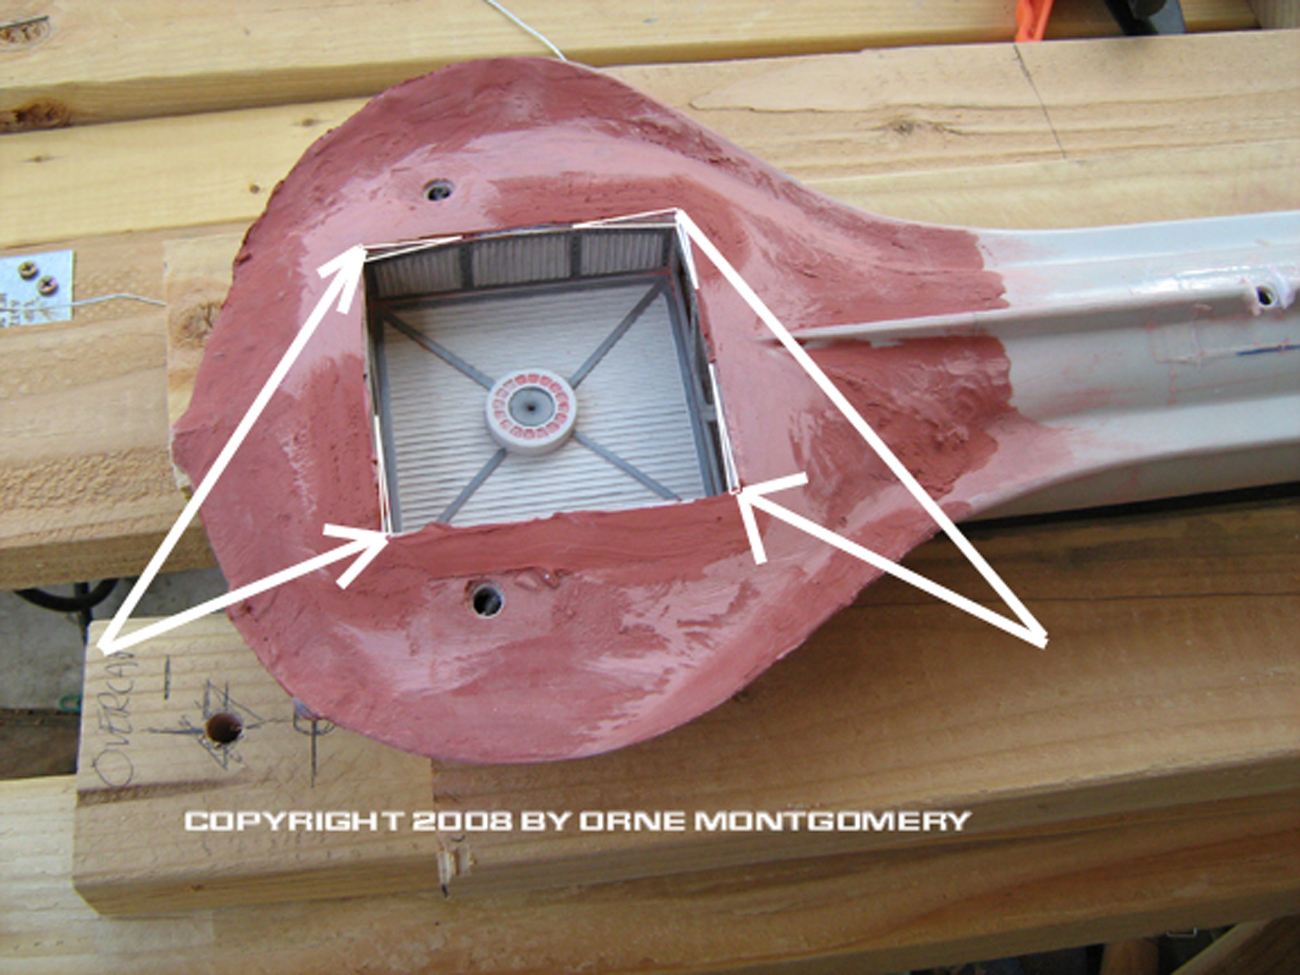
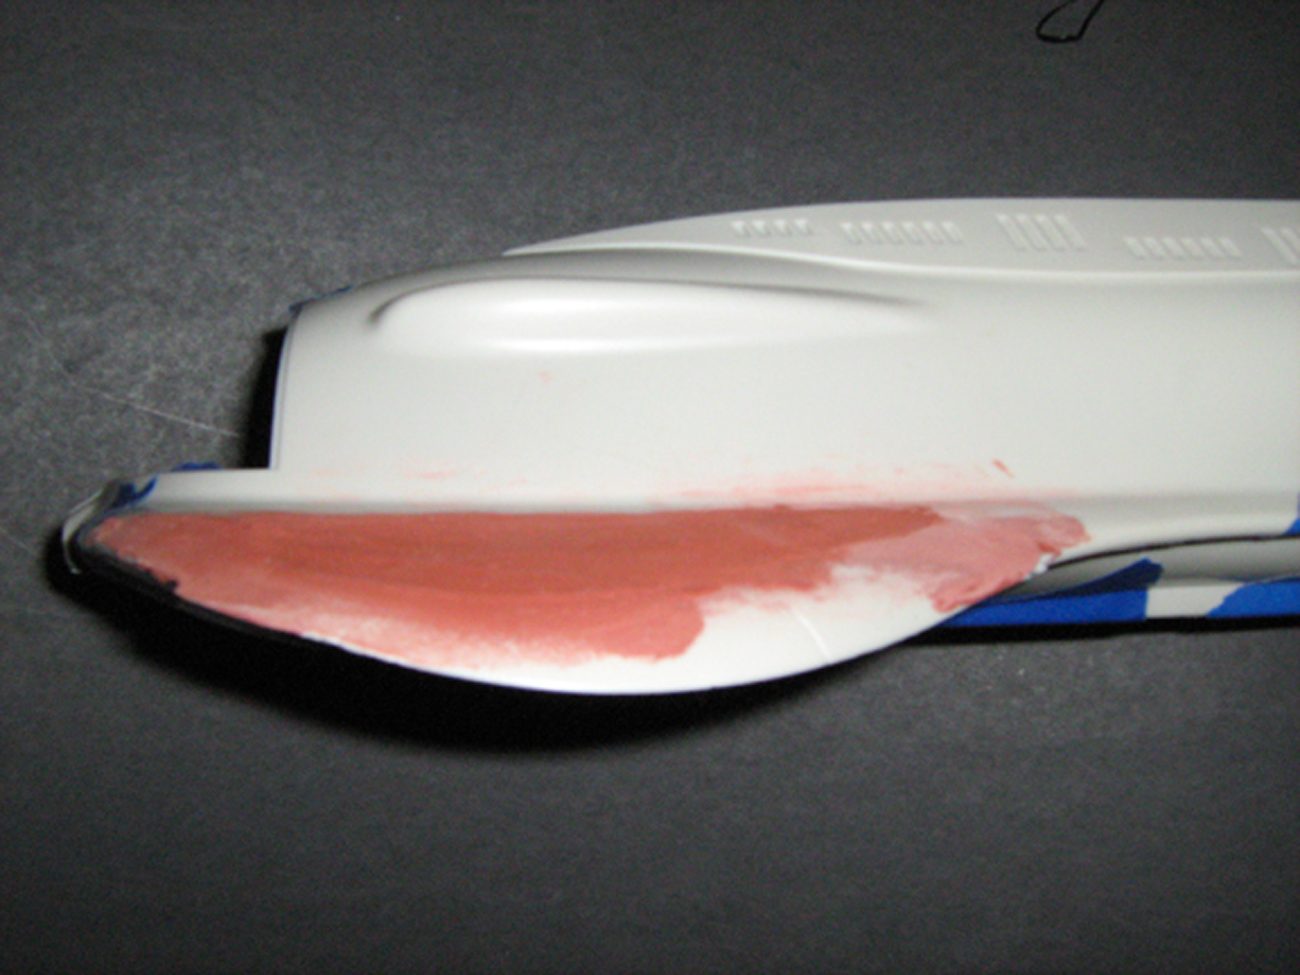
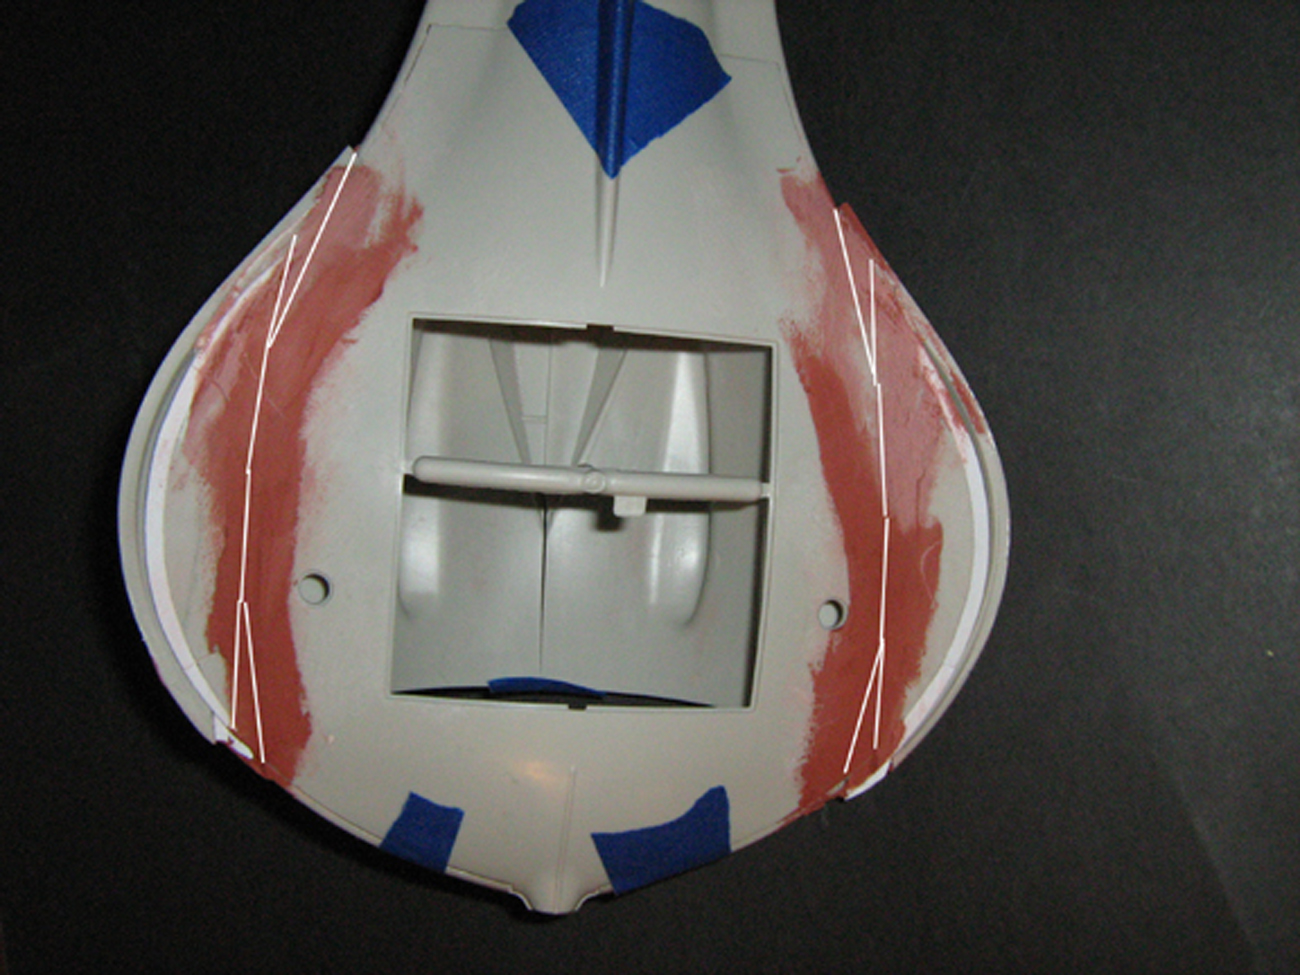
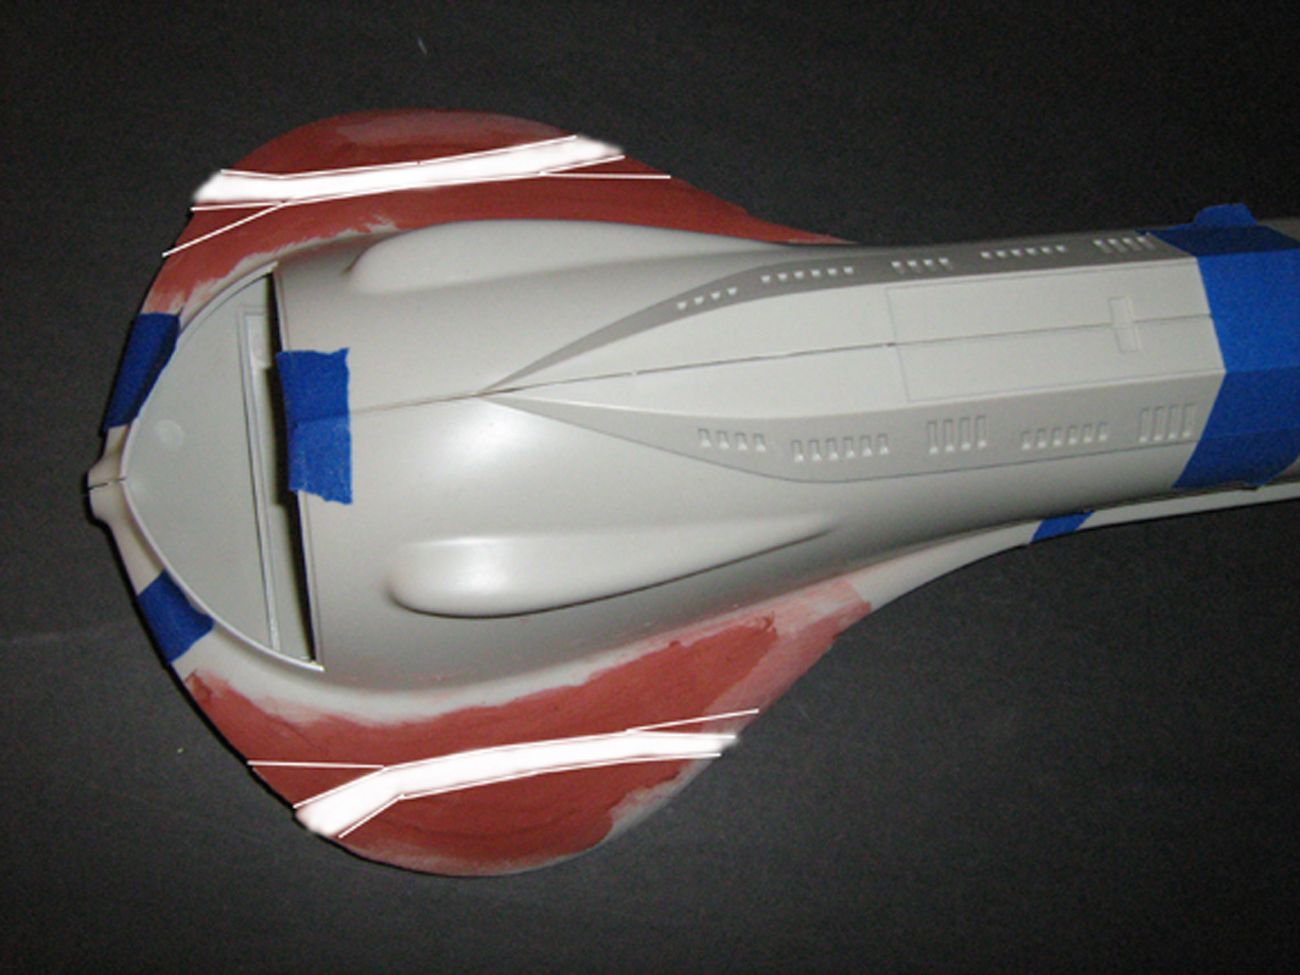
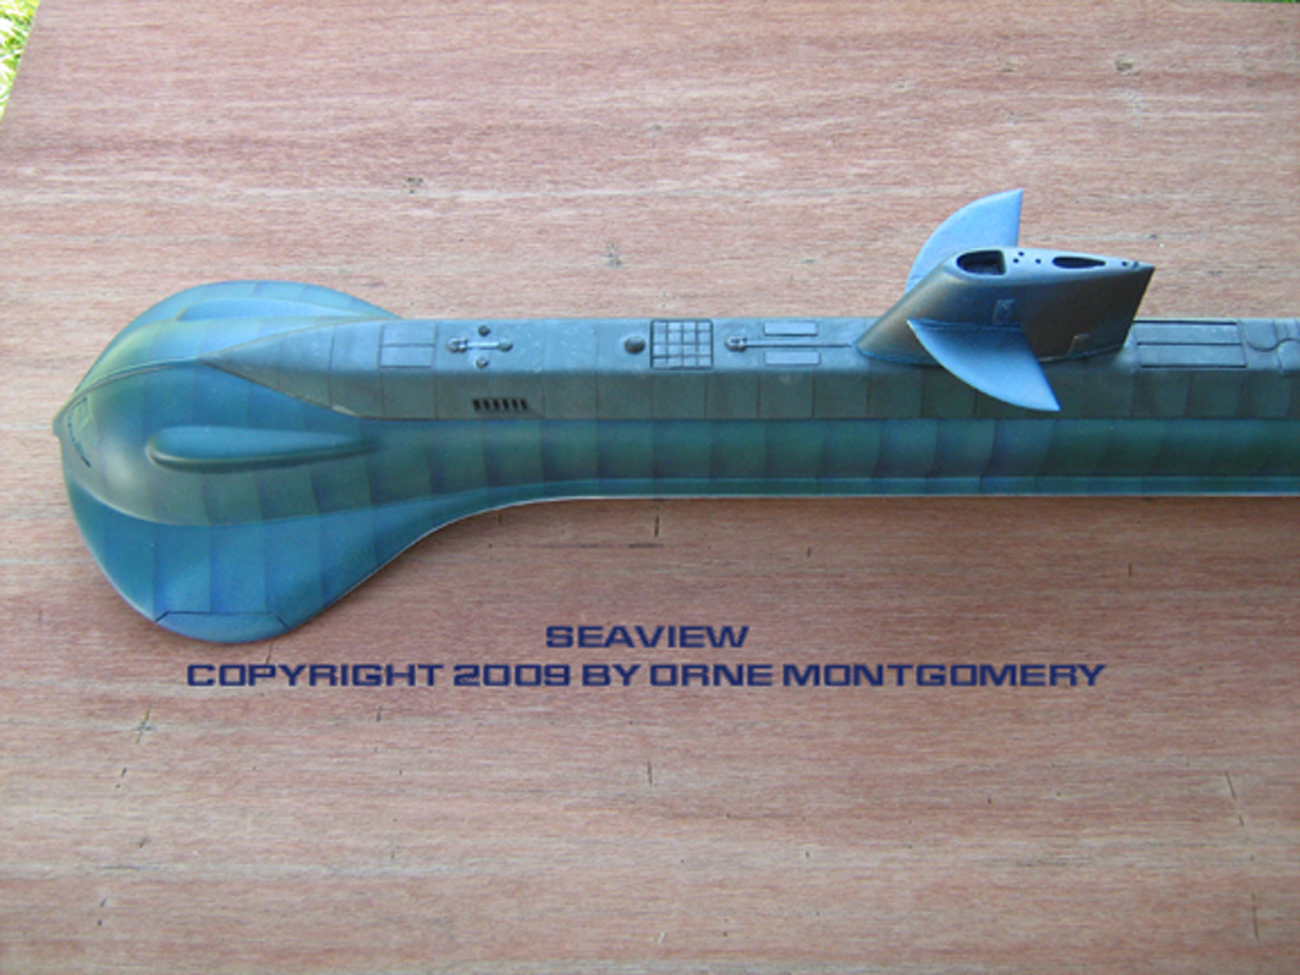
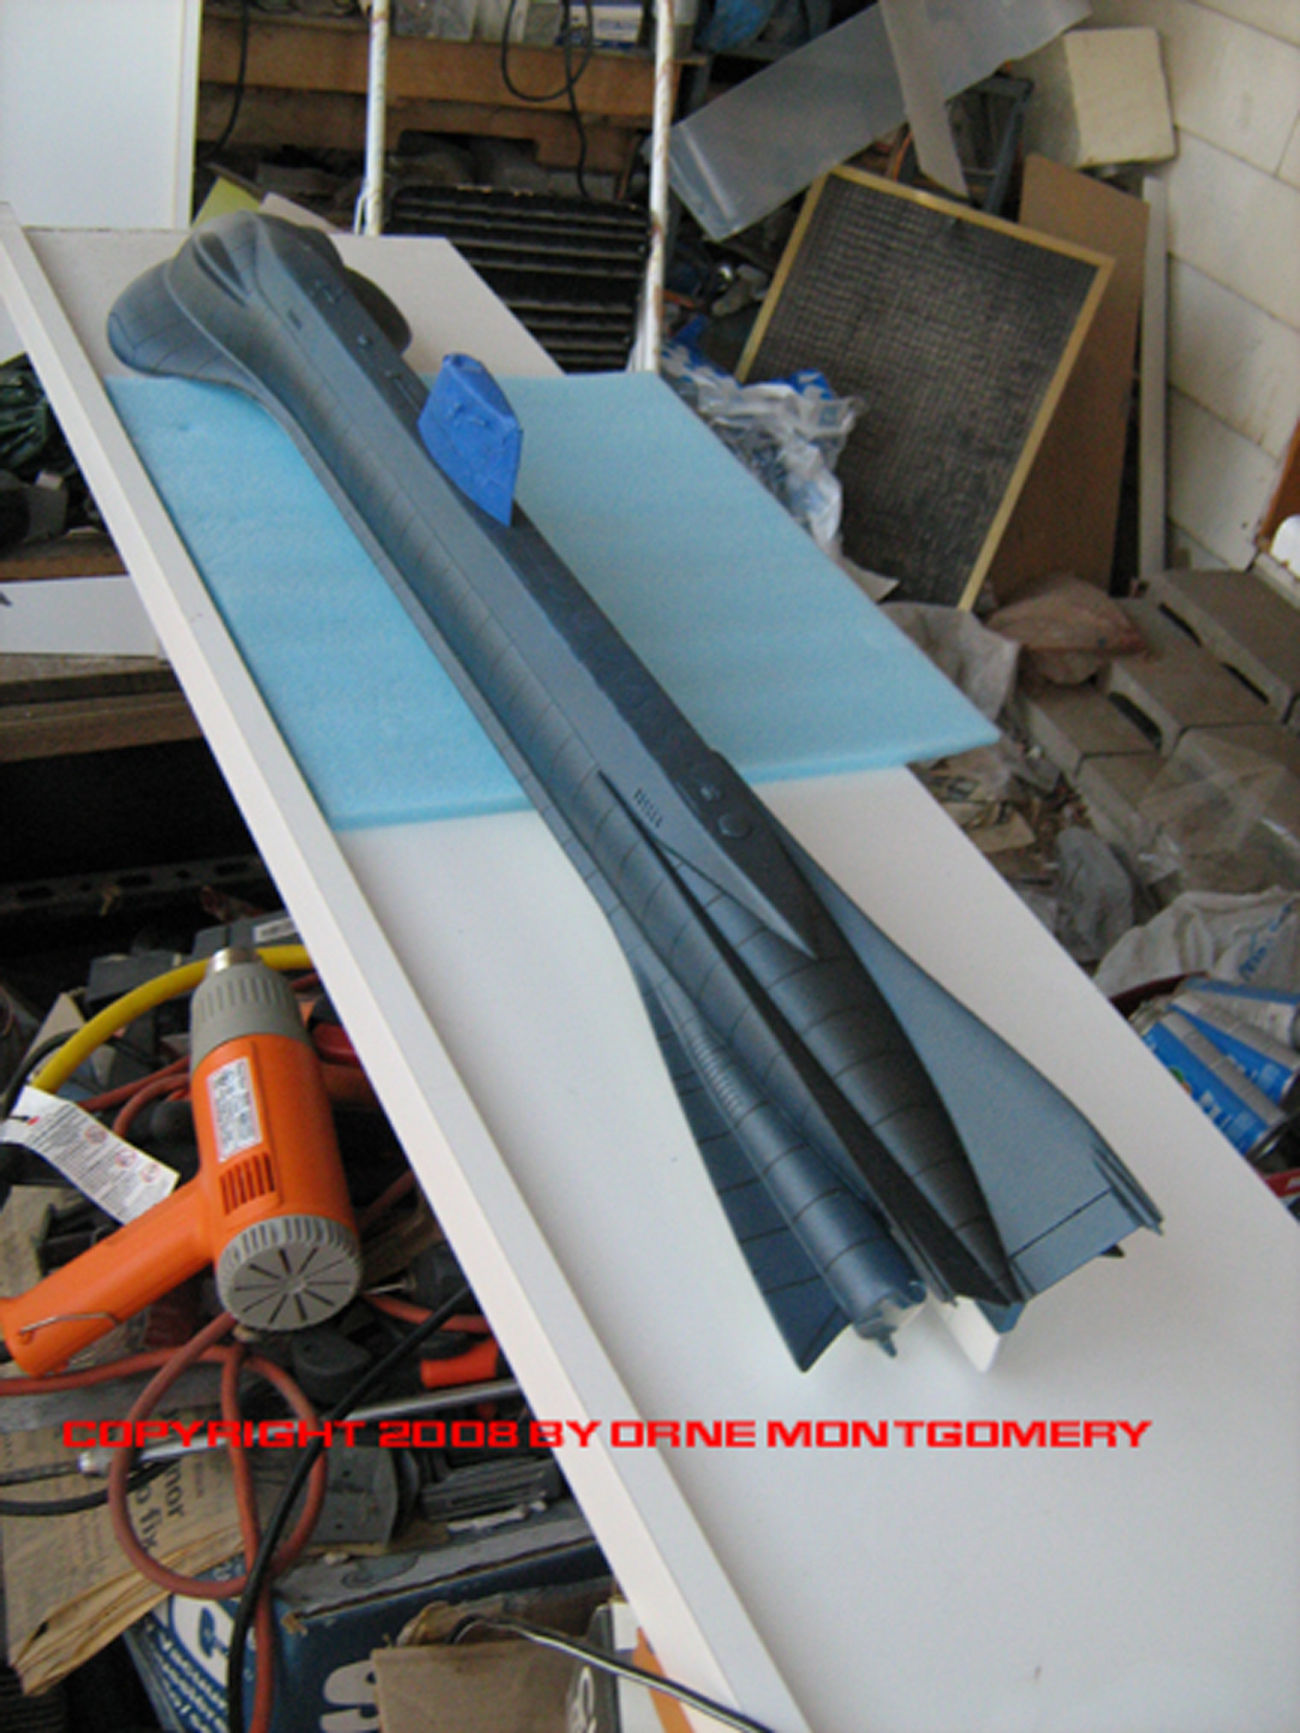
I picked up the Moebius kit shortly after it was released; the fit of the parts/alignment was just about perfect and well-thought out, then I started a taking a real look at the proportions and shapes. The strakes along the hull have semi-rounded edges, leading into the manta wings around the bow, which grows even more more rounded/blunt. Also, the cross-section appeared too flat, with not enough down-curvature toward the tips. The largest concern was the egg-shaped Flying Sub bay. First thing I did was to score the lower half of the wing-set around the hangar, with narrow wedges fore and aft ‘notched’ out (the score-lines marked in photo) and the re-sectioned parts glued back onto the main section. A .40 by .188 Evergreen strip was glued around the outer edges. The upper half of the wings were scored and snapped away in a similar fashion, but spread out farther to ‘wrap’ around the lower tips (the white areas inside the score-lines), and packed with styrene strips. The joints and the edges past the recessed joint-seams were filed down to thin them. I used Bondo glaze to fill over all the work. Once the control-room was installed, the wings would be glued together and finished to shape. The FS bay was ‘squared off’ with styrene strips deeper in shape at the corners. Inserted wedge-spacers inside the opening at the corners (arrows) to support the hatch (pressed the corners down and left it sandwiched between two bricks in the sun, let it cool down, and filed the edges a little to fit more snugly). The entire surrounding area (bordered with white lines) of the bay hump was padded with sections of sheet styrene, filed down smooth at the corners, packed with several layers of glaze and faired into the manta-wings
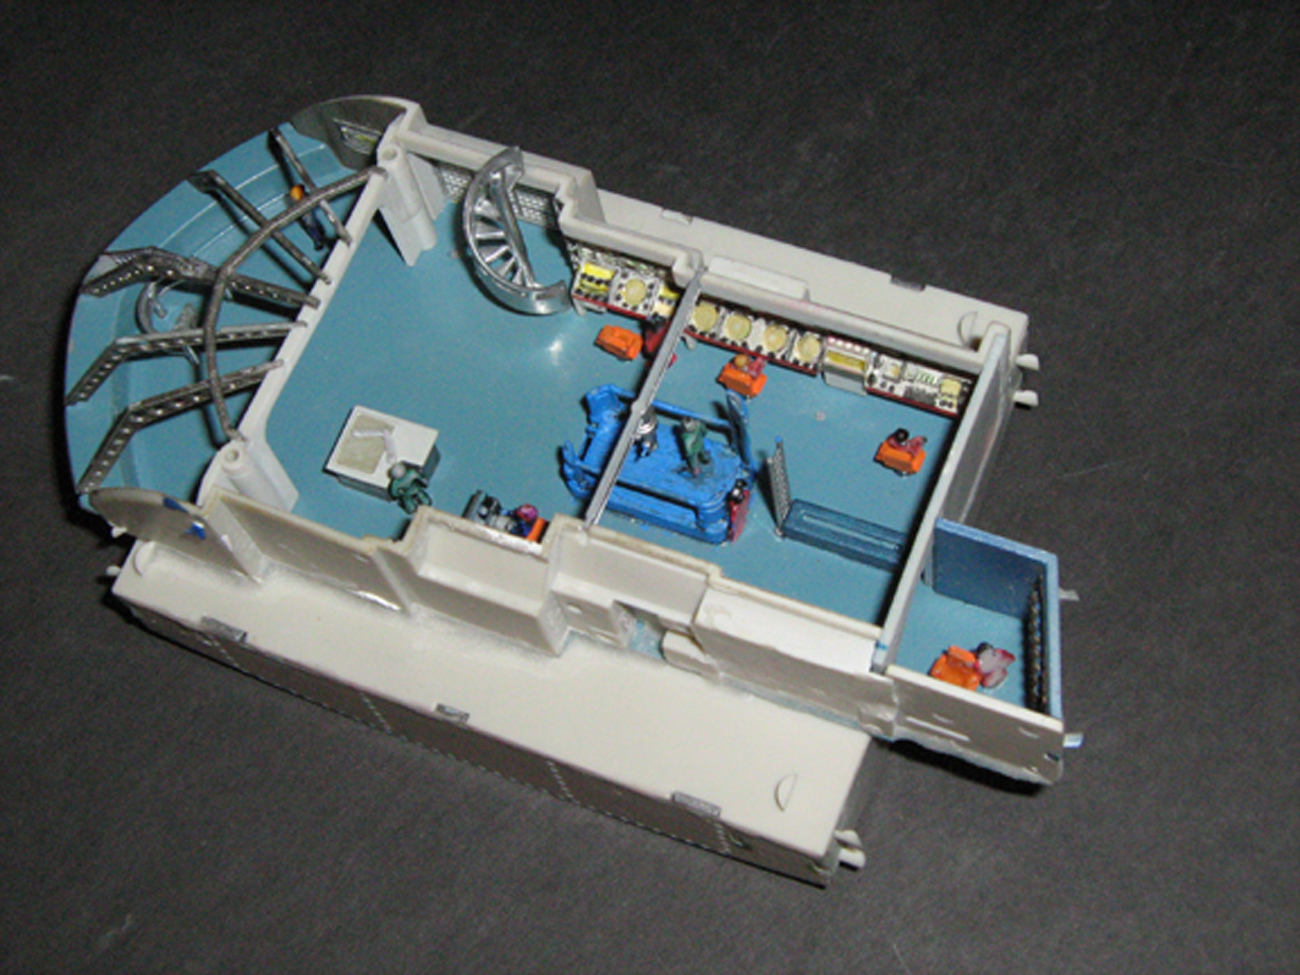
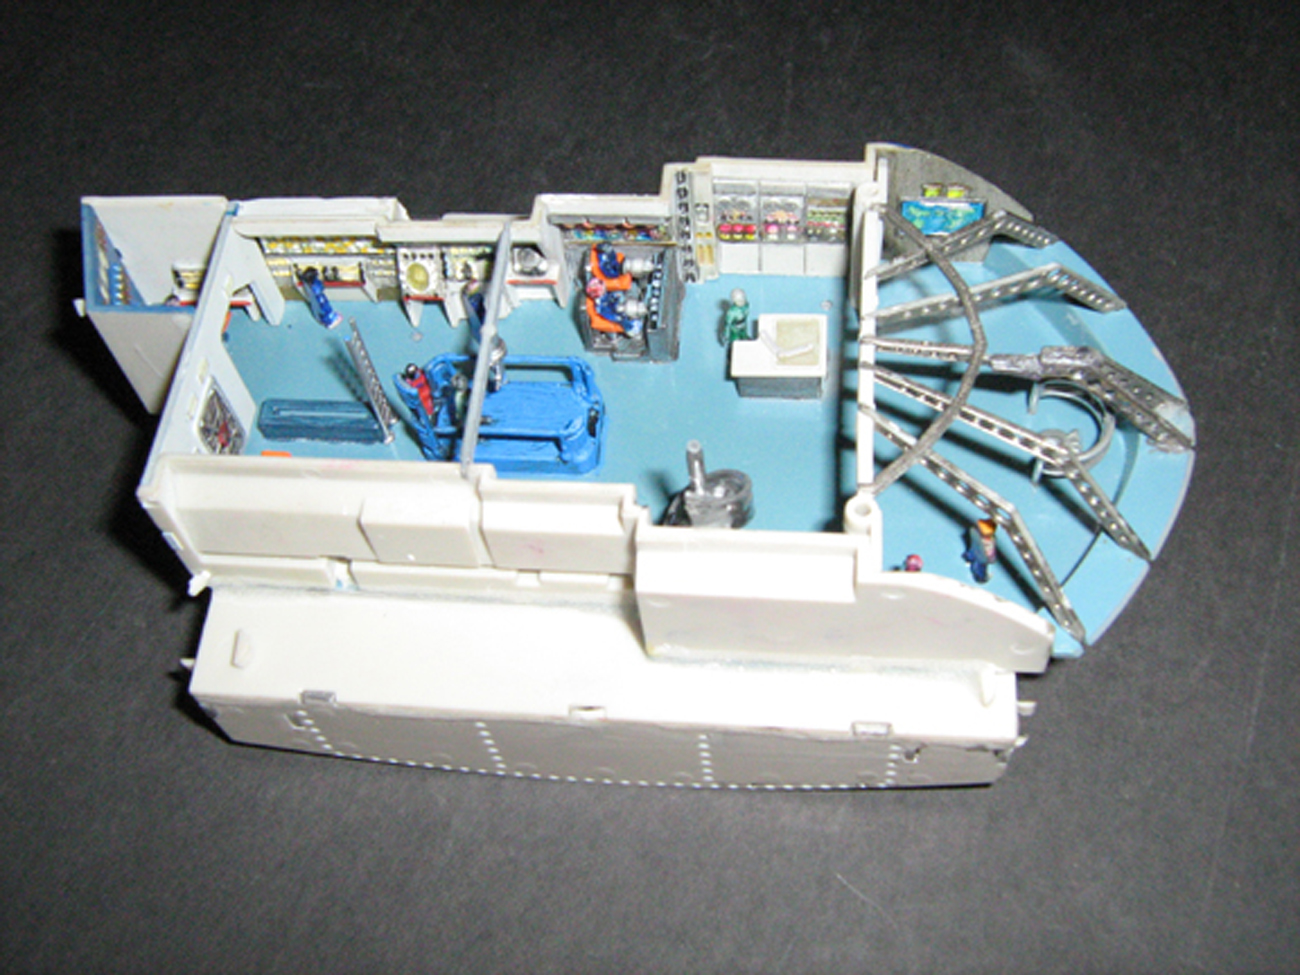
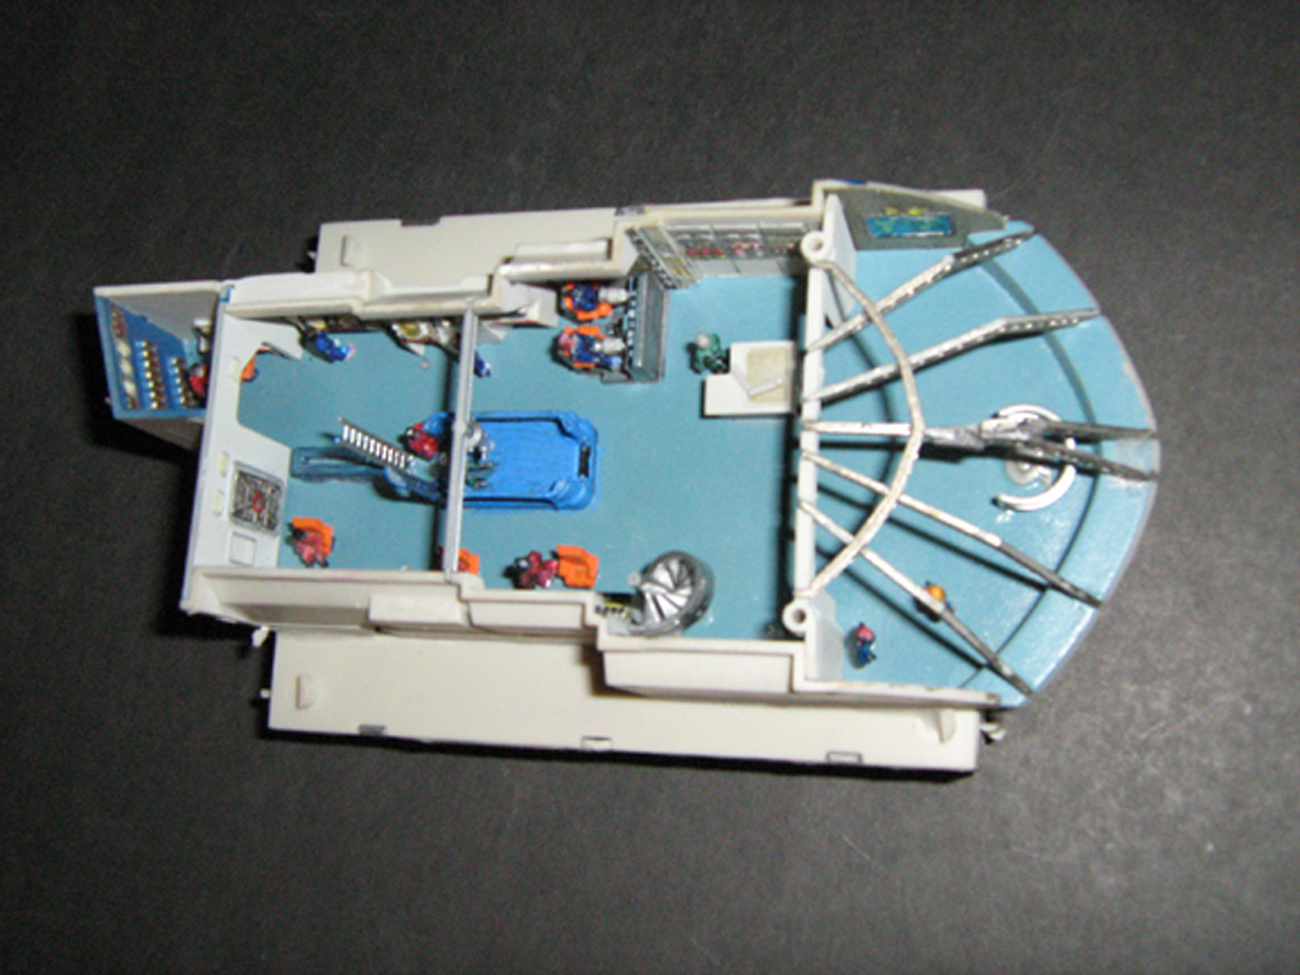
The control room was a straightforward buildup, with glow-medium added to the acrylics for the missile-control panel, lights, radar/sonar screens, and TV displays (both have the same image, a giant manta ray creature gliding beneath an ice-flow). The two scientists arguing about the creature, the two crewmembers at the helm-station (whom I had to bisect at the hips to fit behind the control-wheels), and the standing crewmembers, were resin castings I made from clay-impressions, then painted up to match the kit crew-figures. The control-room looked a little barren of people so I went with this quick fix; because they were only detailed on the front-side, I positioned them at angles only visible through the main windows. The remaining controls, etc. were picked out with pens, pencils, acrylics, and enamels. The world-map was painted in on the port side of the observation room. Replaced the windows with distortion-free .030 PETG inserts and some strips to match up to the girders.]
The control room lighting was partly salvaged from a pair of rechargeable flashlights, including two halogen lights for the rear lighting and searchlight, and the two square housings with LEDs mounted to the centerline. The rest are clear/colored wheat bulbs; a batch more went into the sail and taifin lighting. The inner hull-halves around the control room were painted flat black and lined with metal tape; extra tape strips were added around the halogen bulbs to reflect any heat off the plastic. It’s very hard to see with the camera flash, but the interior is pretty well lit. All the wiring was connected to a power jack fitted inside the first display stand mounting-hole, and was originally powered by a standard 9V wallpack transformer; upgraded to 12v.
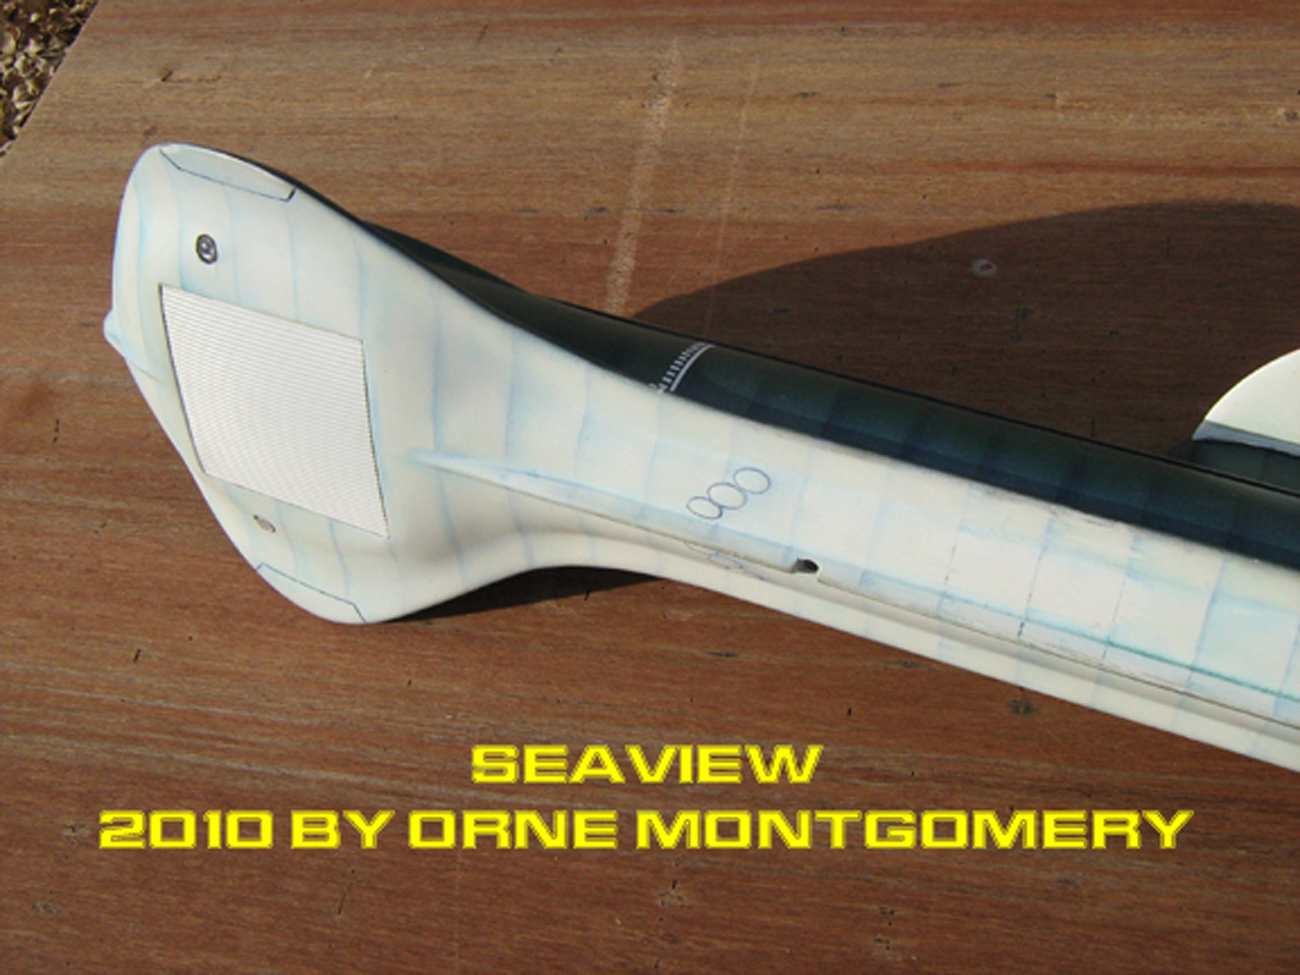
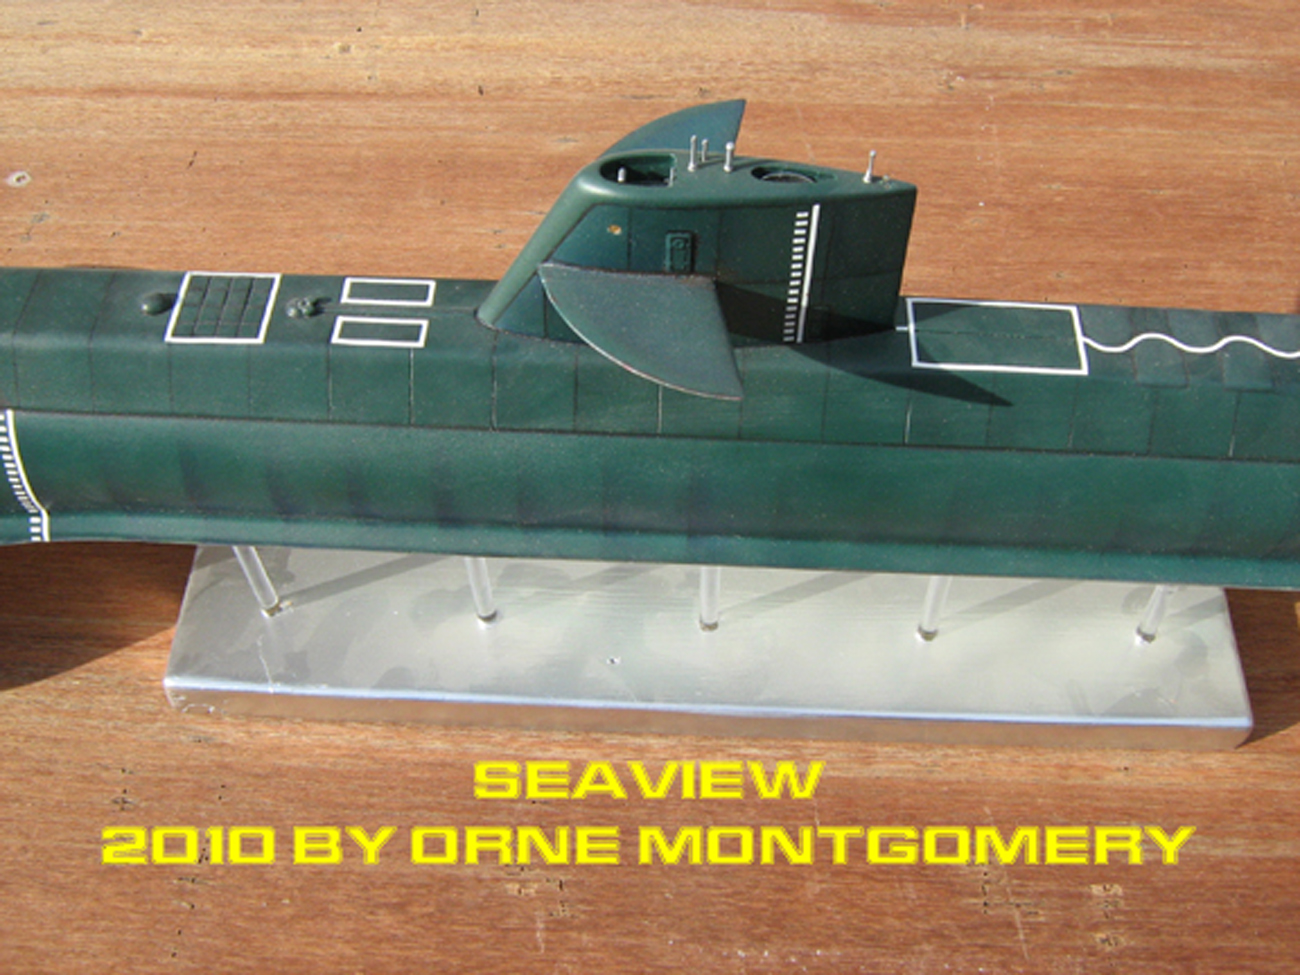
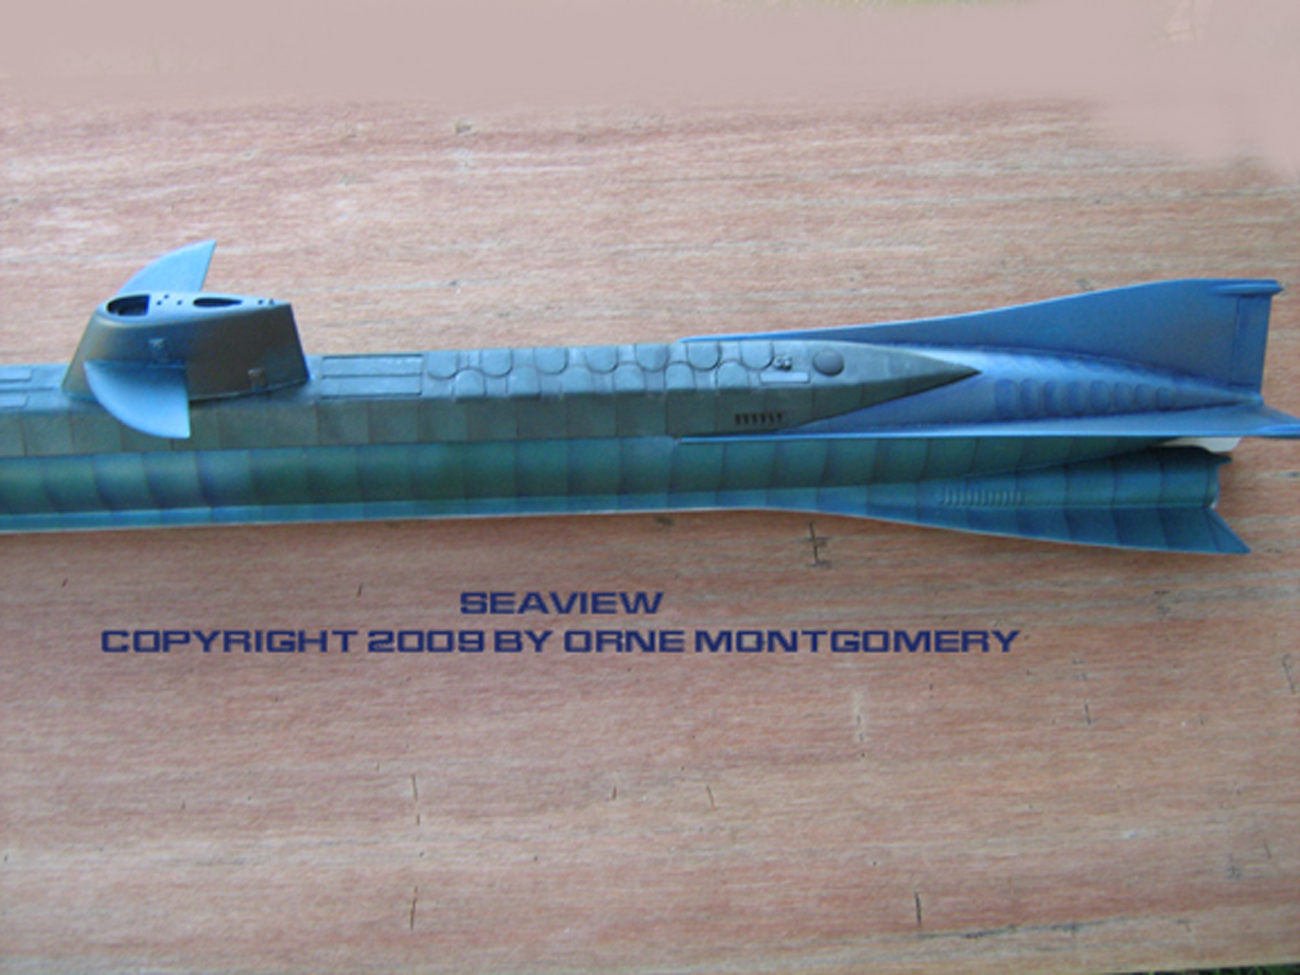
I mounted inside the sail a balsa inner-deck with holes drilled out for aluminum tube shafts – one extra shaft was added for a second periscope – and used the kit masts fixed to smaller diameter aluminum tubes which fit inside the shafts. The trailing edge of the sail was a little too blunt, so added some evergreen strips and filed it down to a knife-edge.
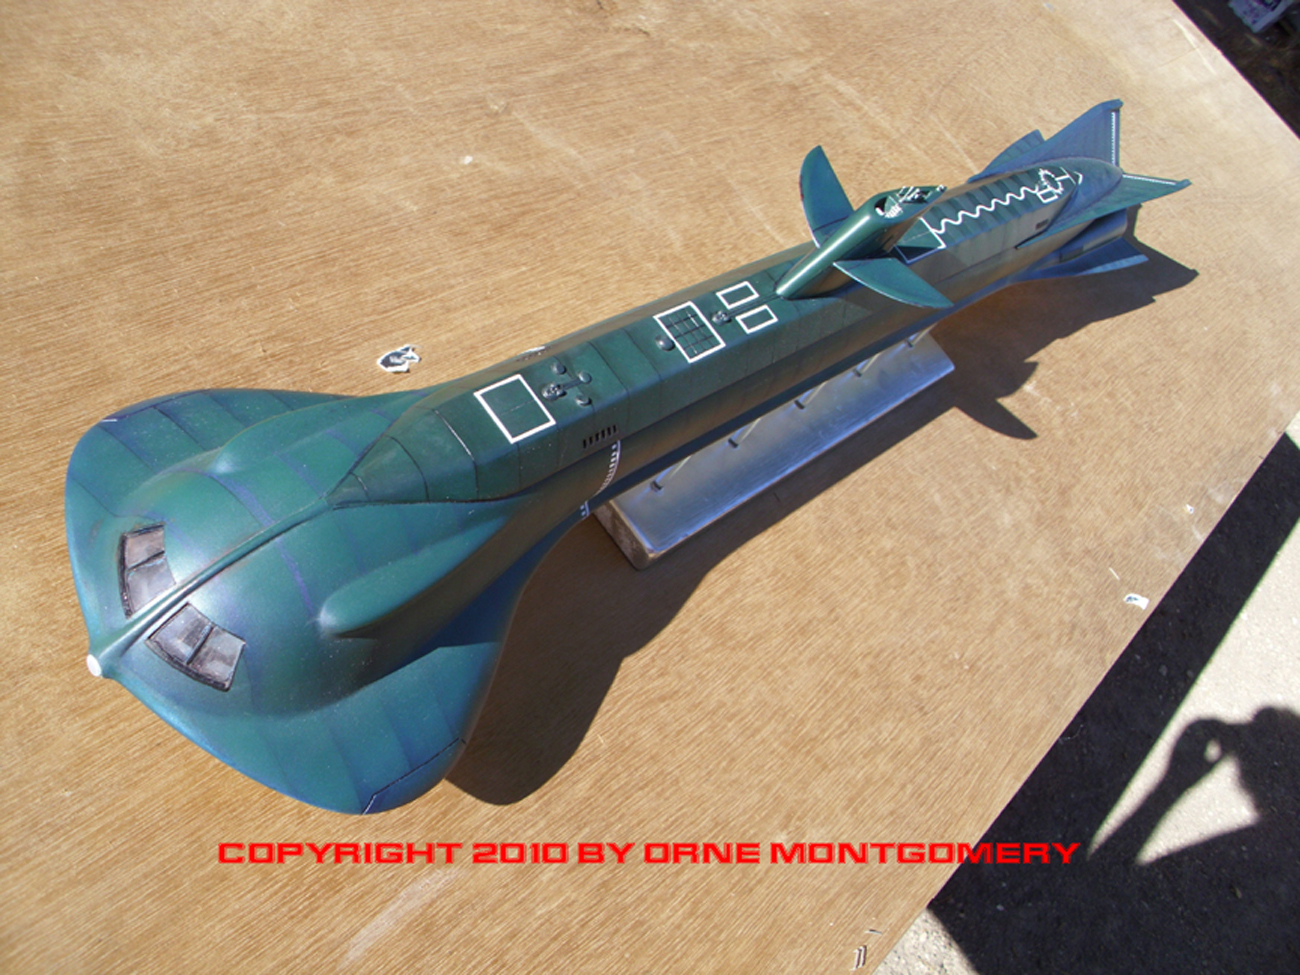
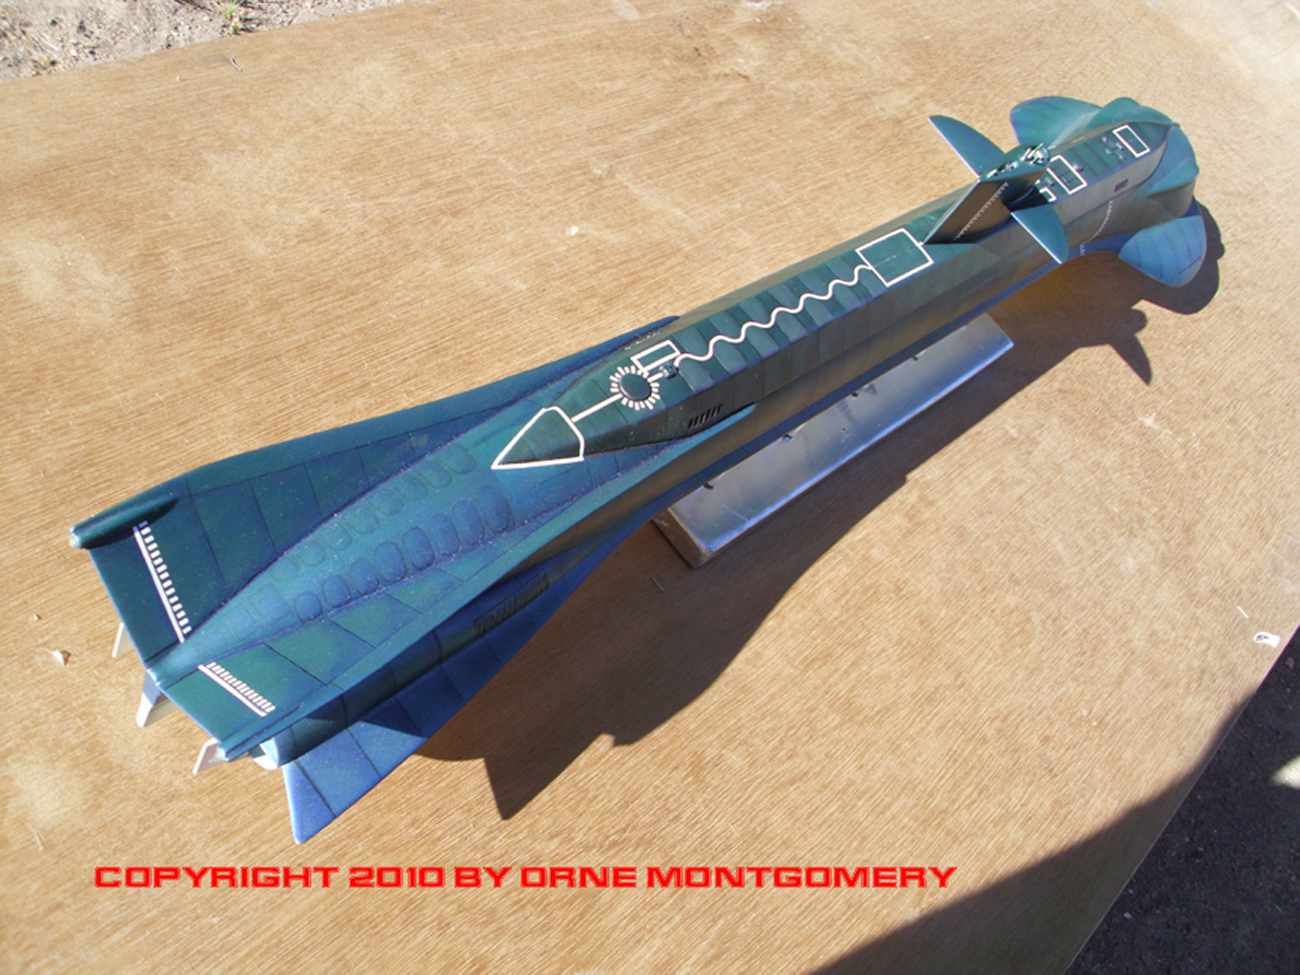
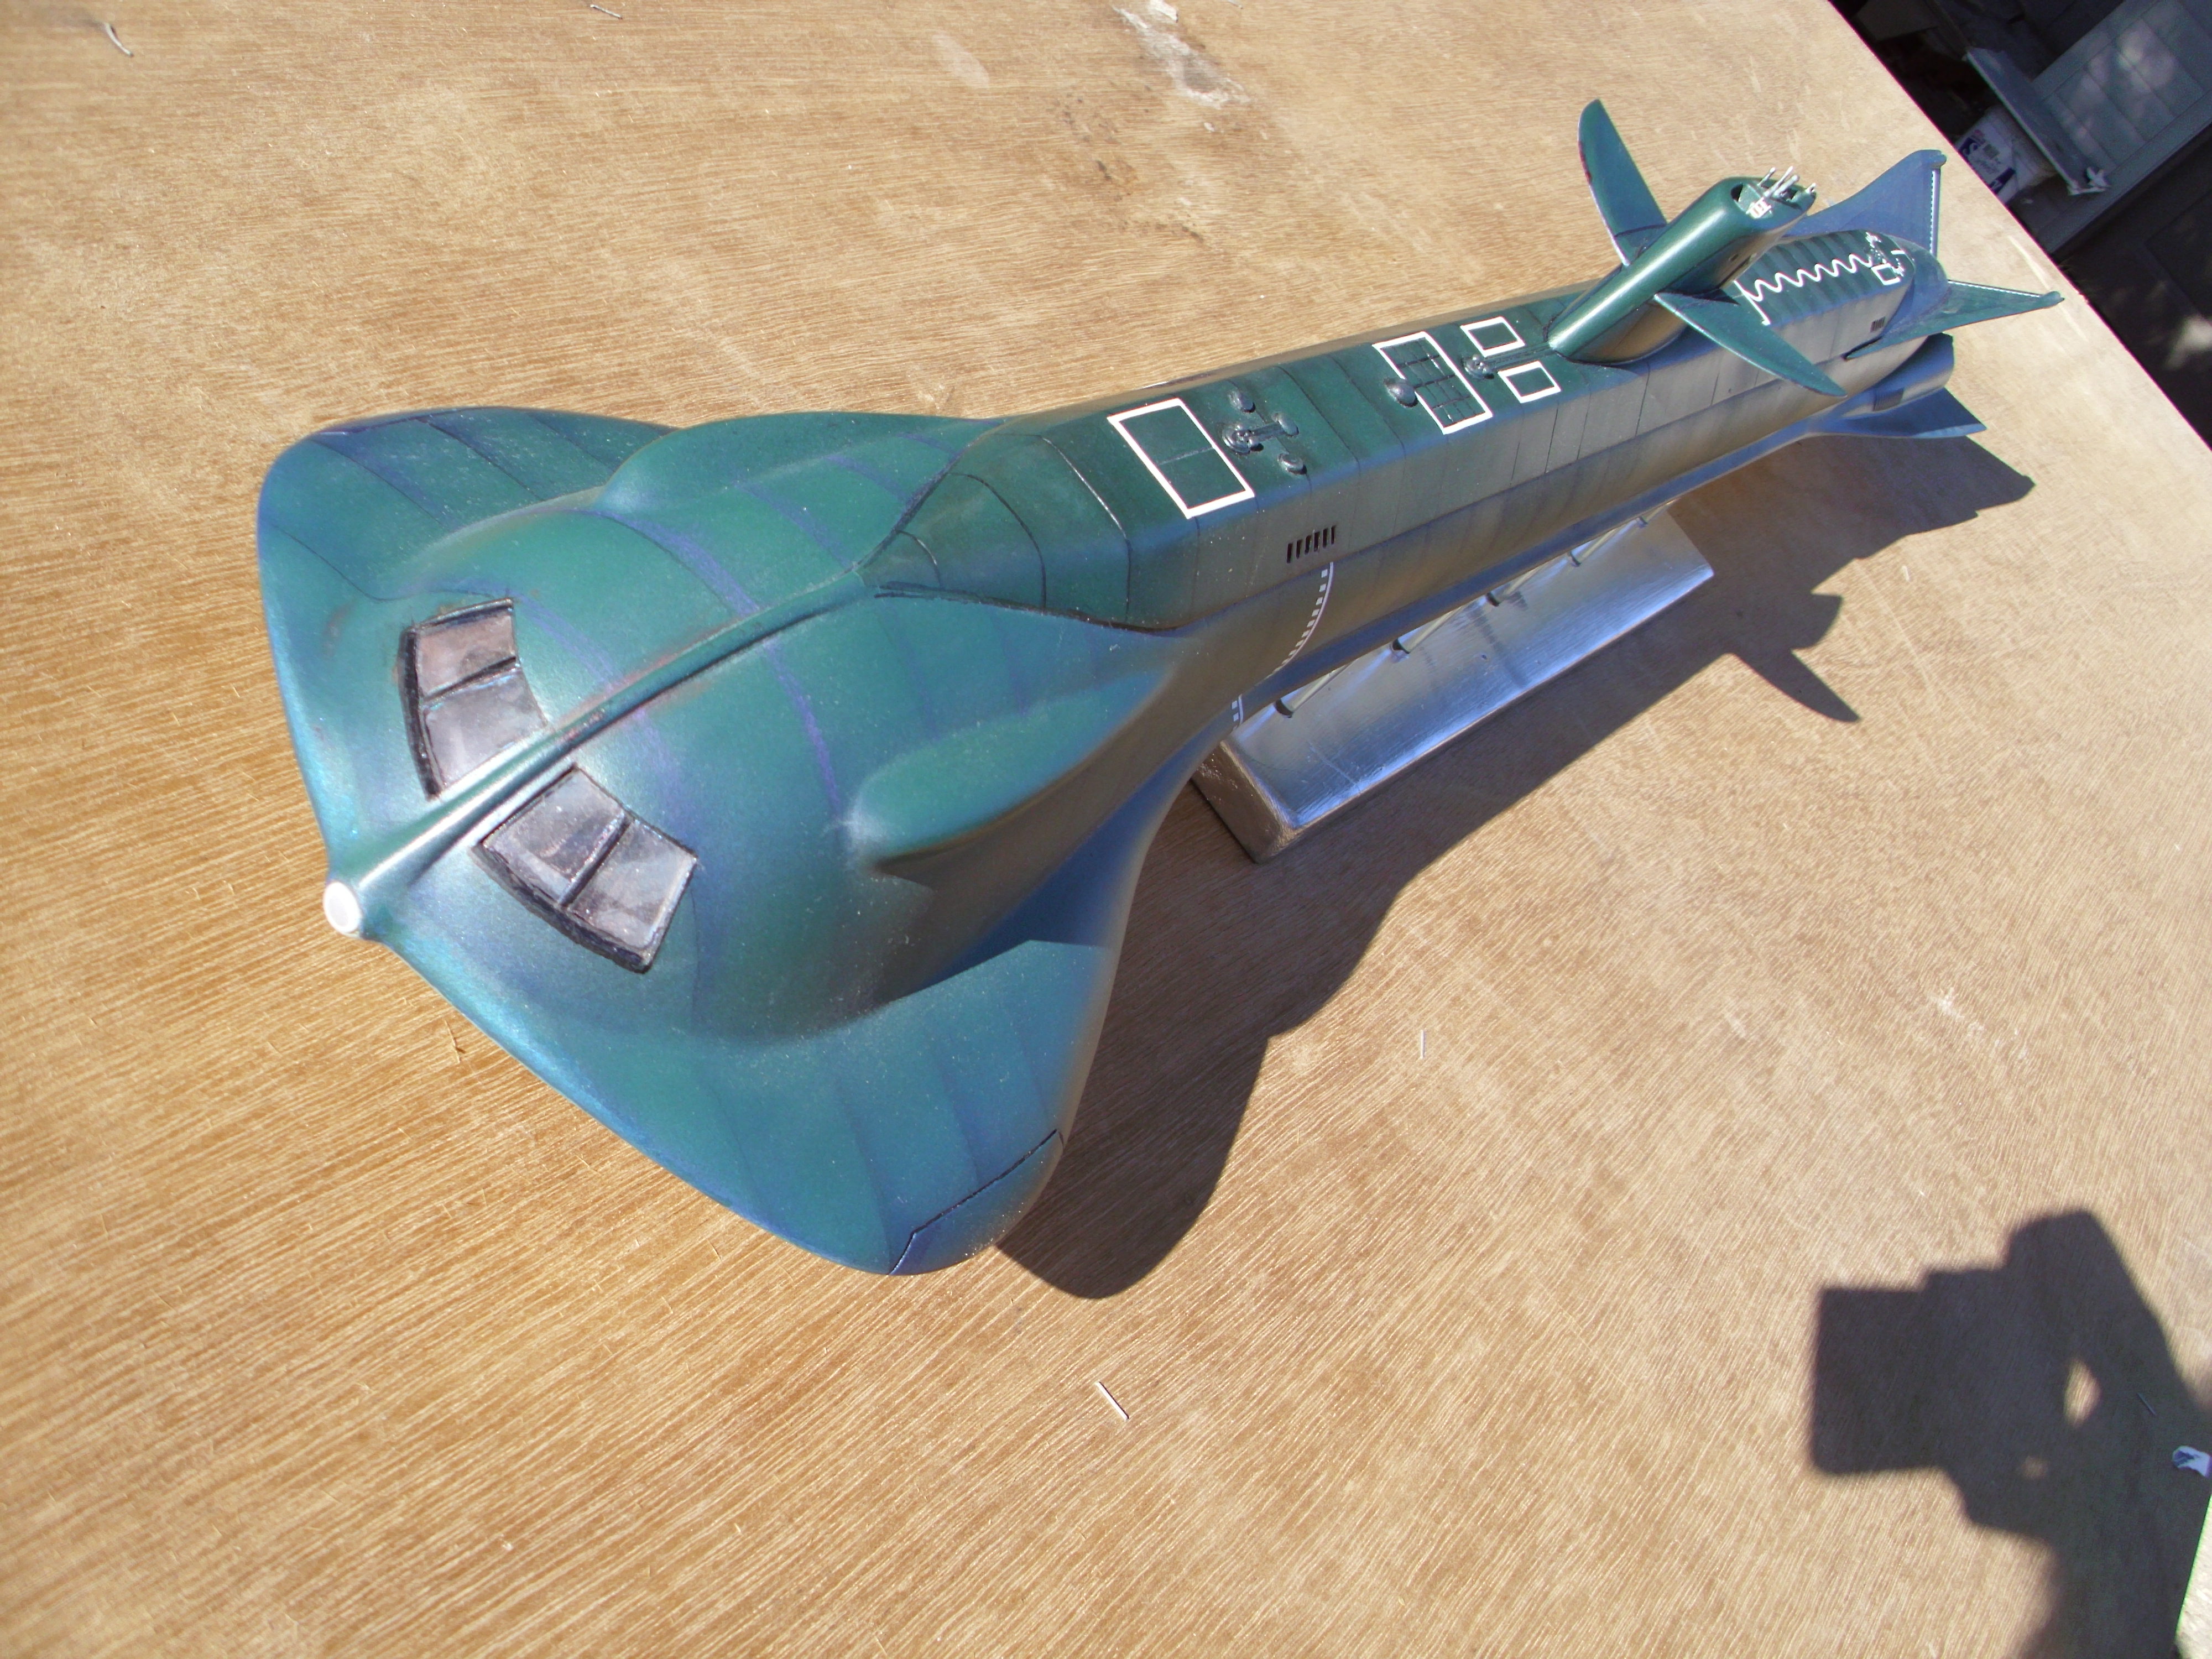
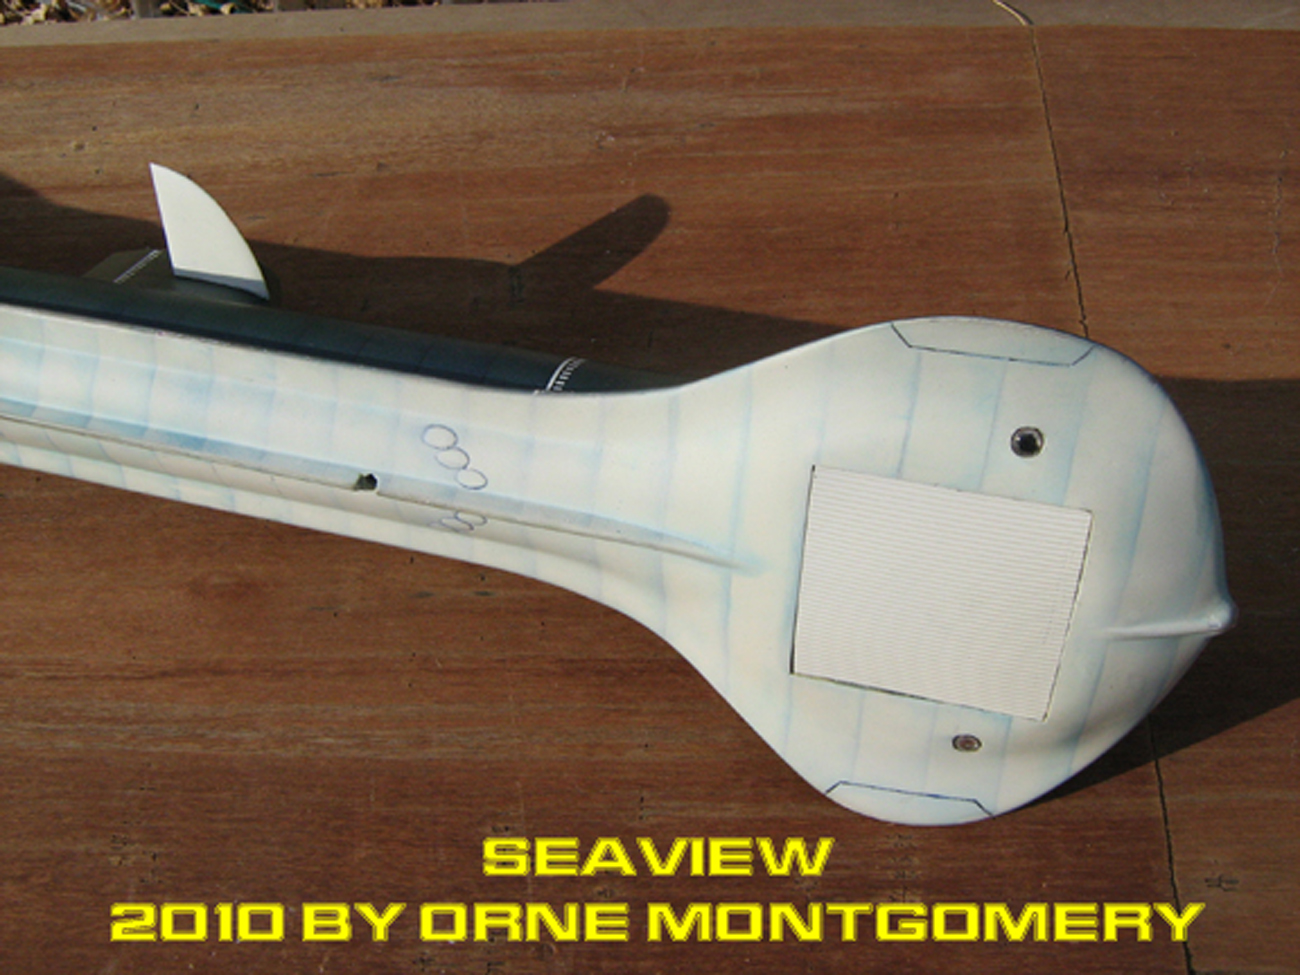
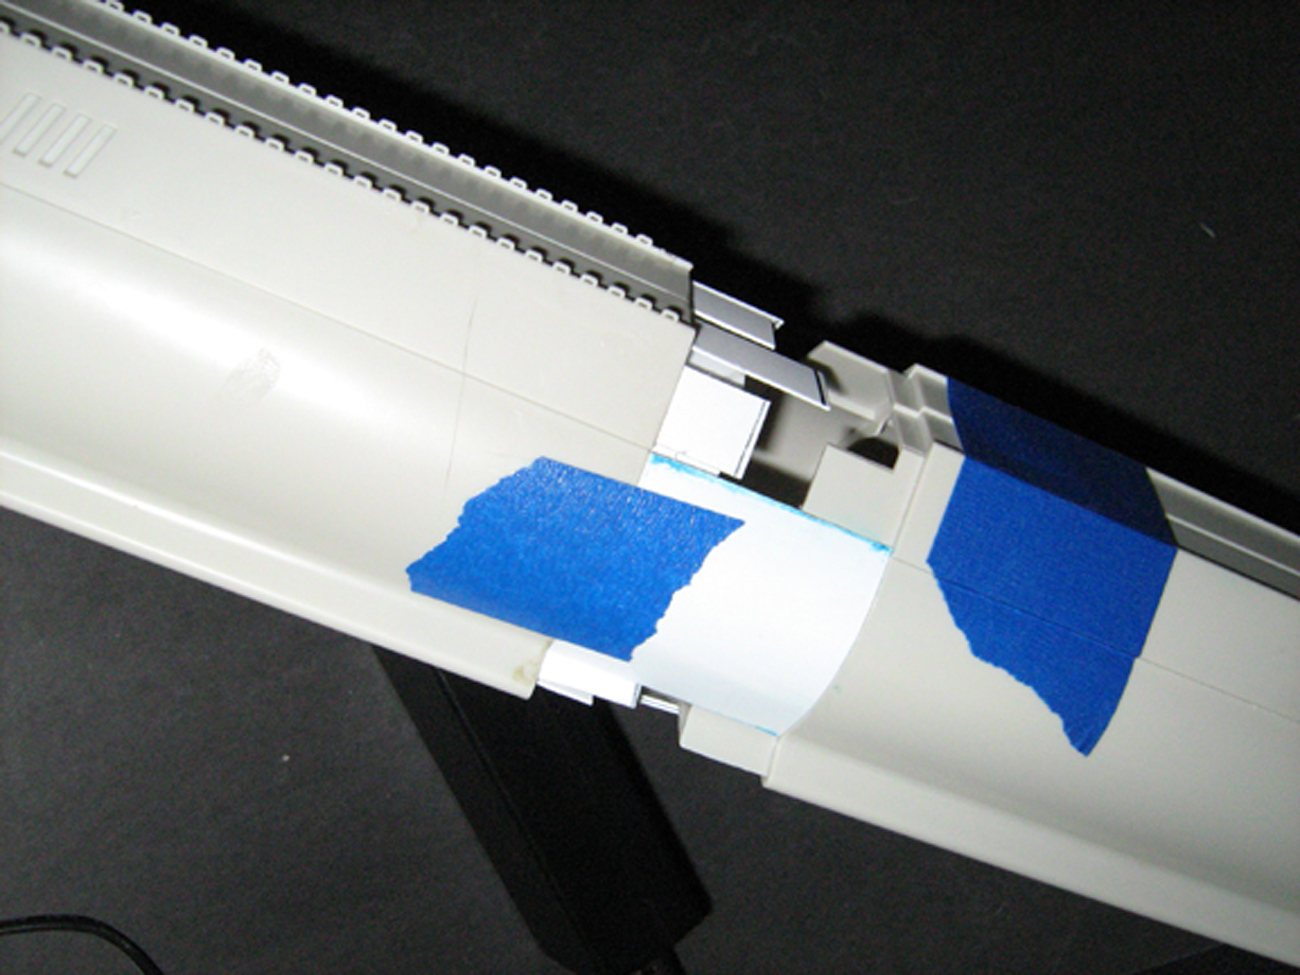
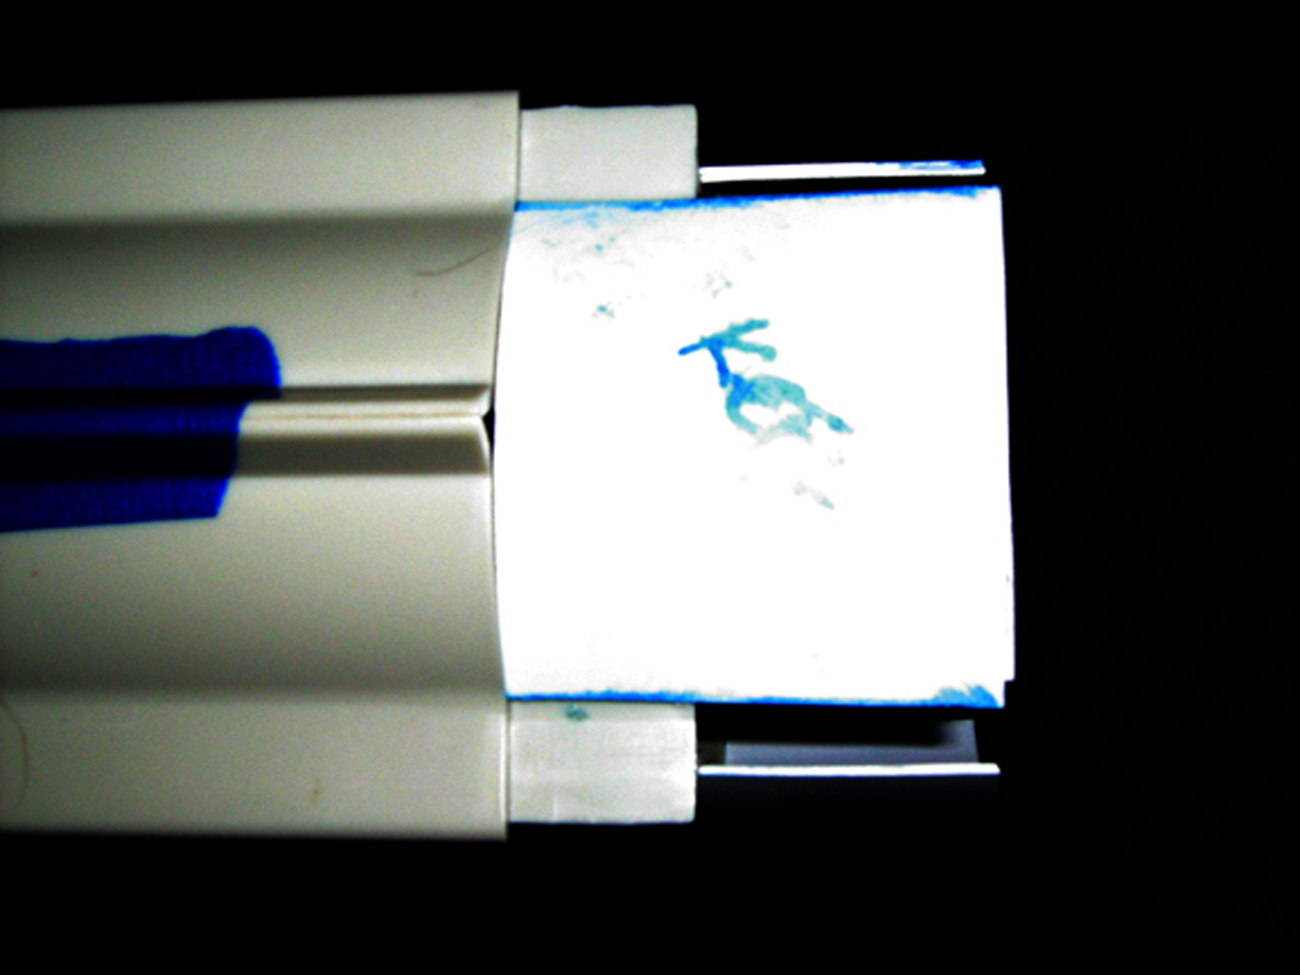
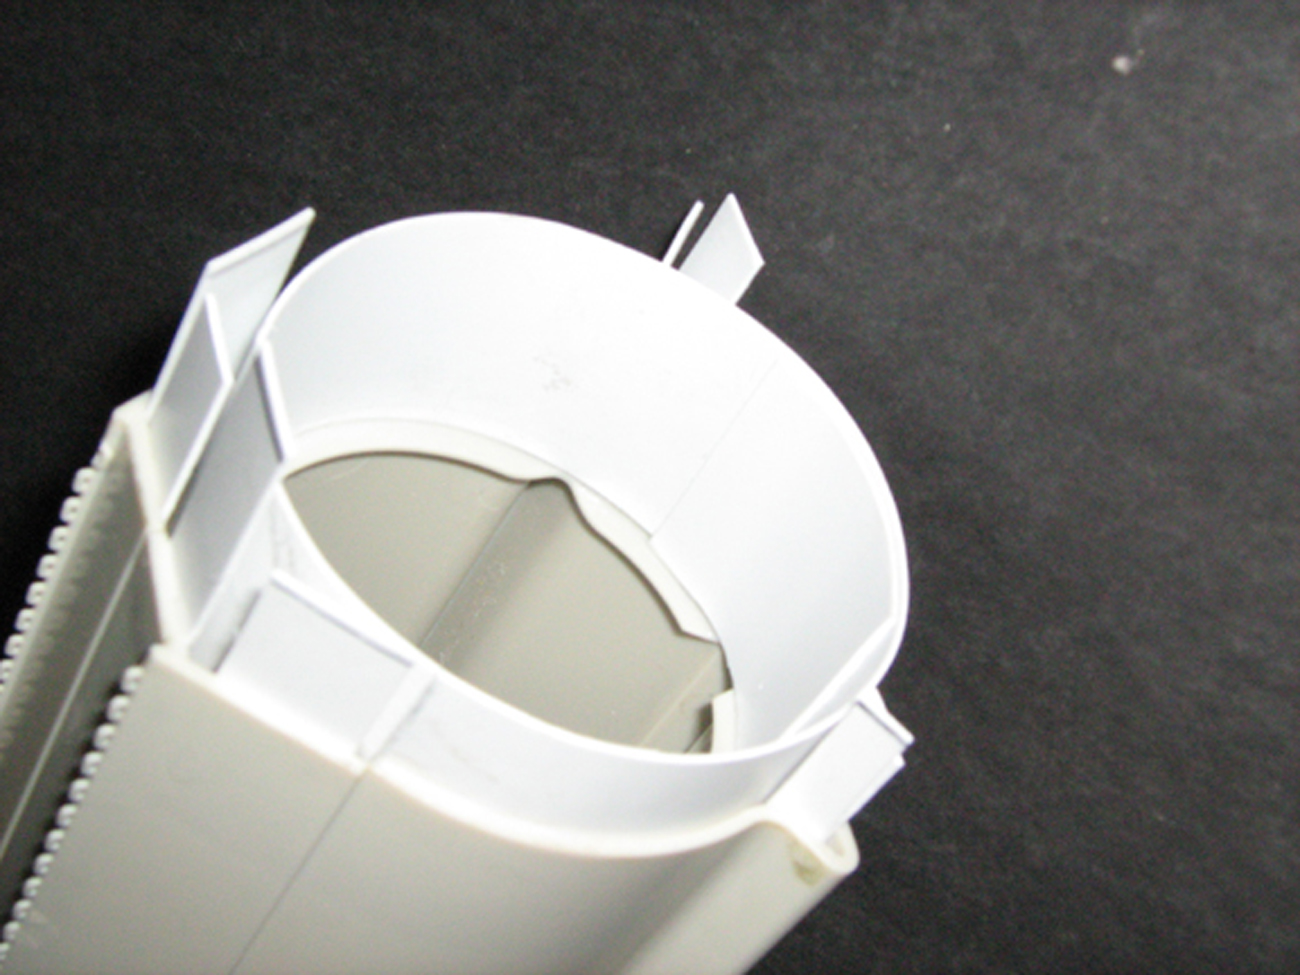
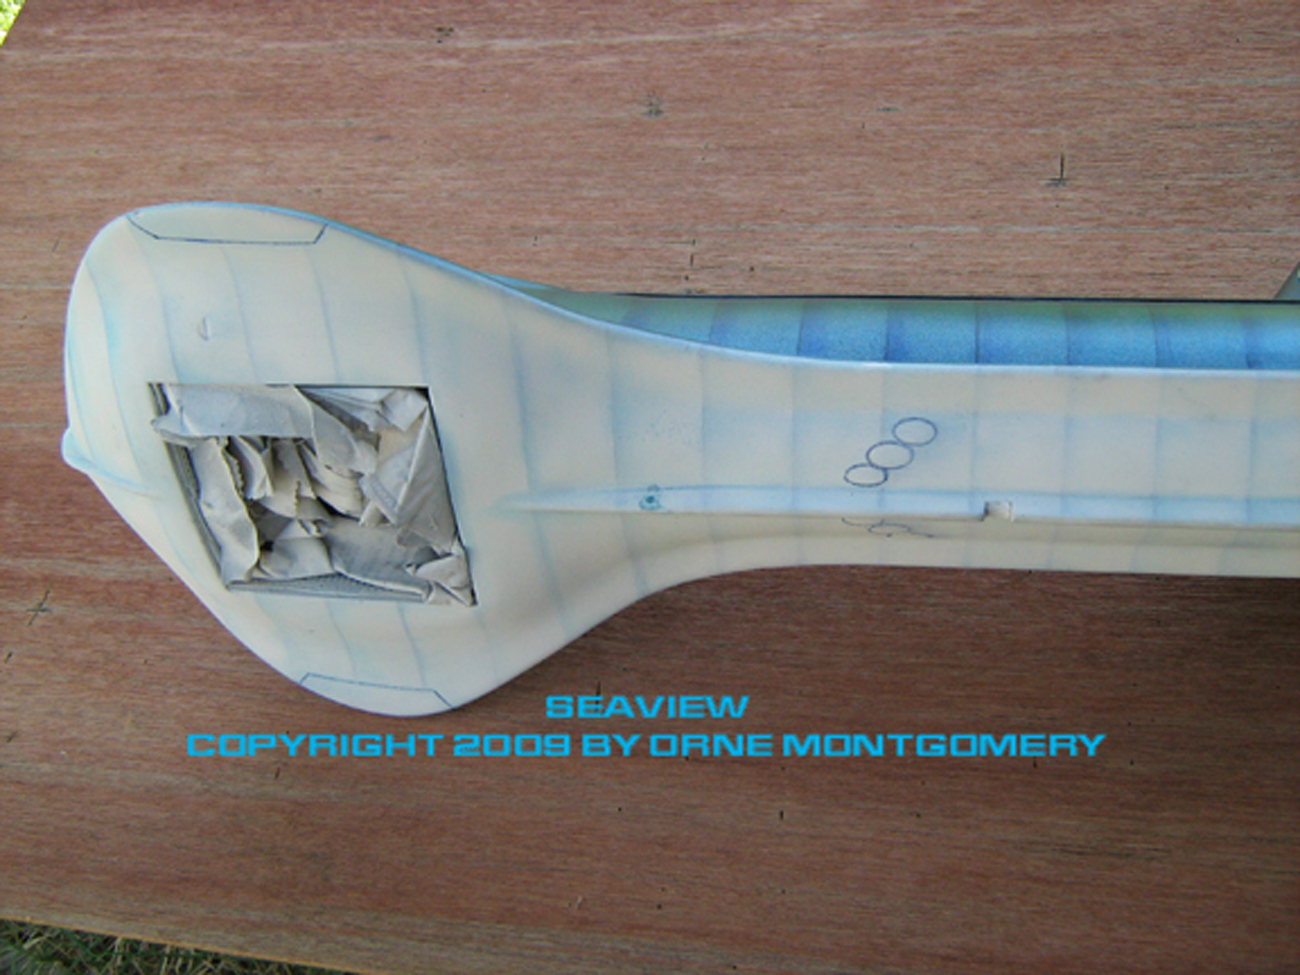
Don’t take what I’m saying above as nitpicky, the kit is a real treat, and I can say that honestly since I’ve scratchbuilt 36″ and 66″ versions (see the “Infinity Reach” gallery at my website www.rebellioncreations.com for the pictures). The model is fine if it’s based on the 8′ shooting model, and only comes up a bit short in length compared to the 17′ model; I was building the latter, so one more major alteration was made, adding a 2″ hull plug in the mid-section with interior plug-extensions and thin laminated hull skins. Strake and keel extensions were built into the open spaces to match the extended hull length, and I moved the deck section with the sail plug back several inches. Repositioning some of the kit deck-parts, I added some ‘modernizing’ scratchbuilt features: a cruise-missile (or sounding rocket) launch-tube bay forward of the sail; a revised missile-deck sized to accomadate anything up to a Trident C-2 ICBM, with staggered hatches scribed in place; torpedo-loading and cargo hatch covers; and a vertical sea-launch bay for the Venus Probes seen during the run of the show. While the Venus Probes were shown in a few scenes, and a complete (and typically oversized) interior control-center was built and filmed, the Seaview models weren’t changed for what should have been the placement of a large hatch. I converted the 2″ hull-section plug for the bay, drilling out the thick plastic and opening a square hole in the deck; erected a six-sided launch-bay with vertical rails to keep the model from slopping around. The upper half of the bay was capped with a detailed opening split-hatch, with R/C aircraft CA hinges in the lengthwise edges.
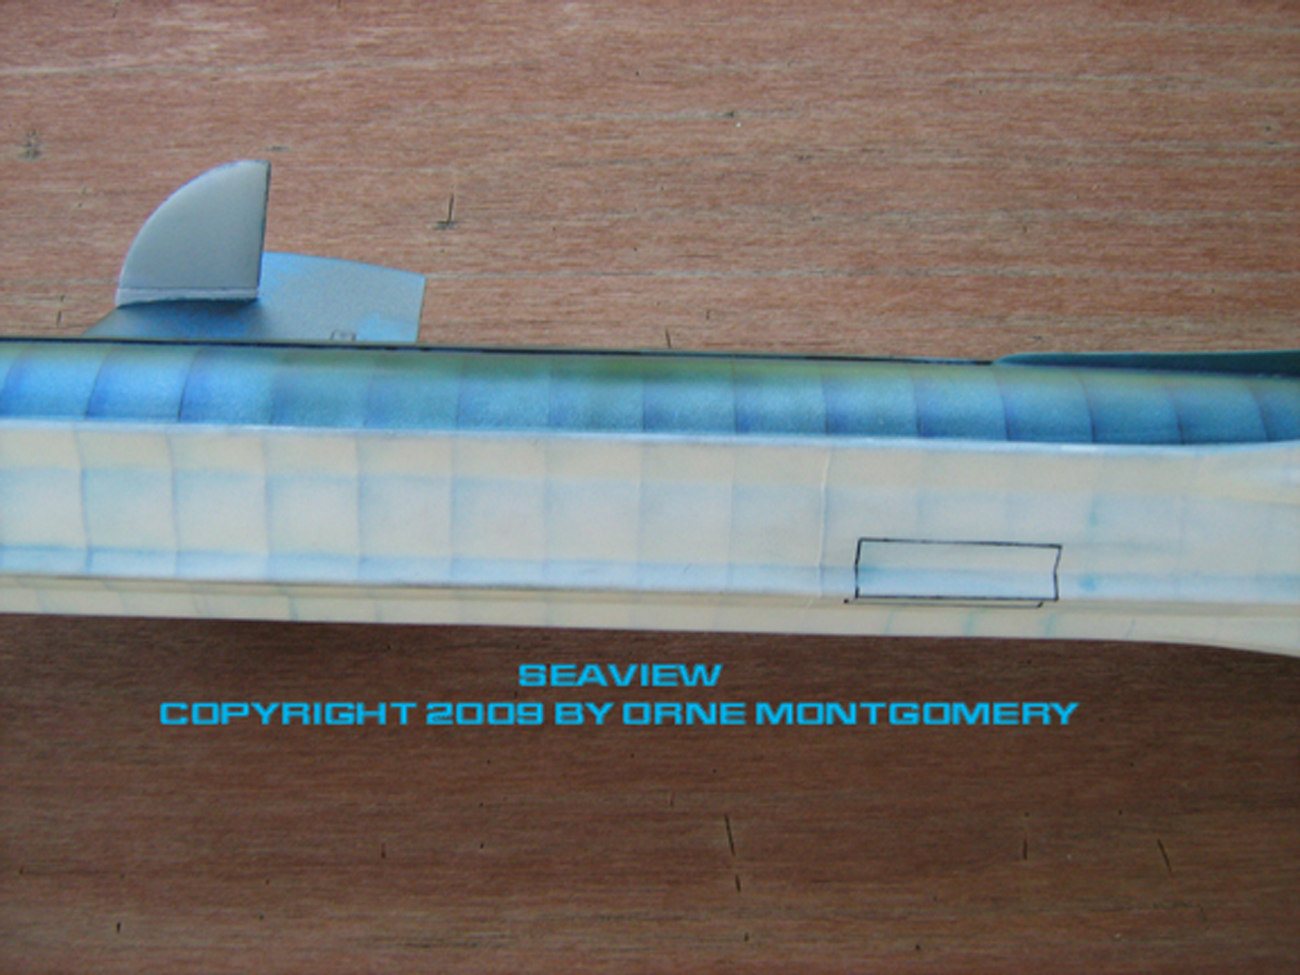
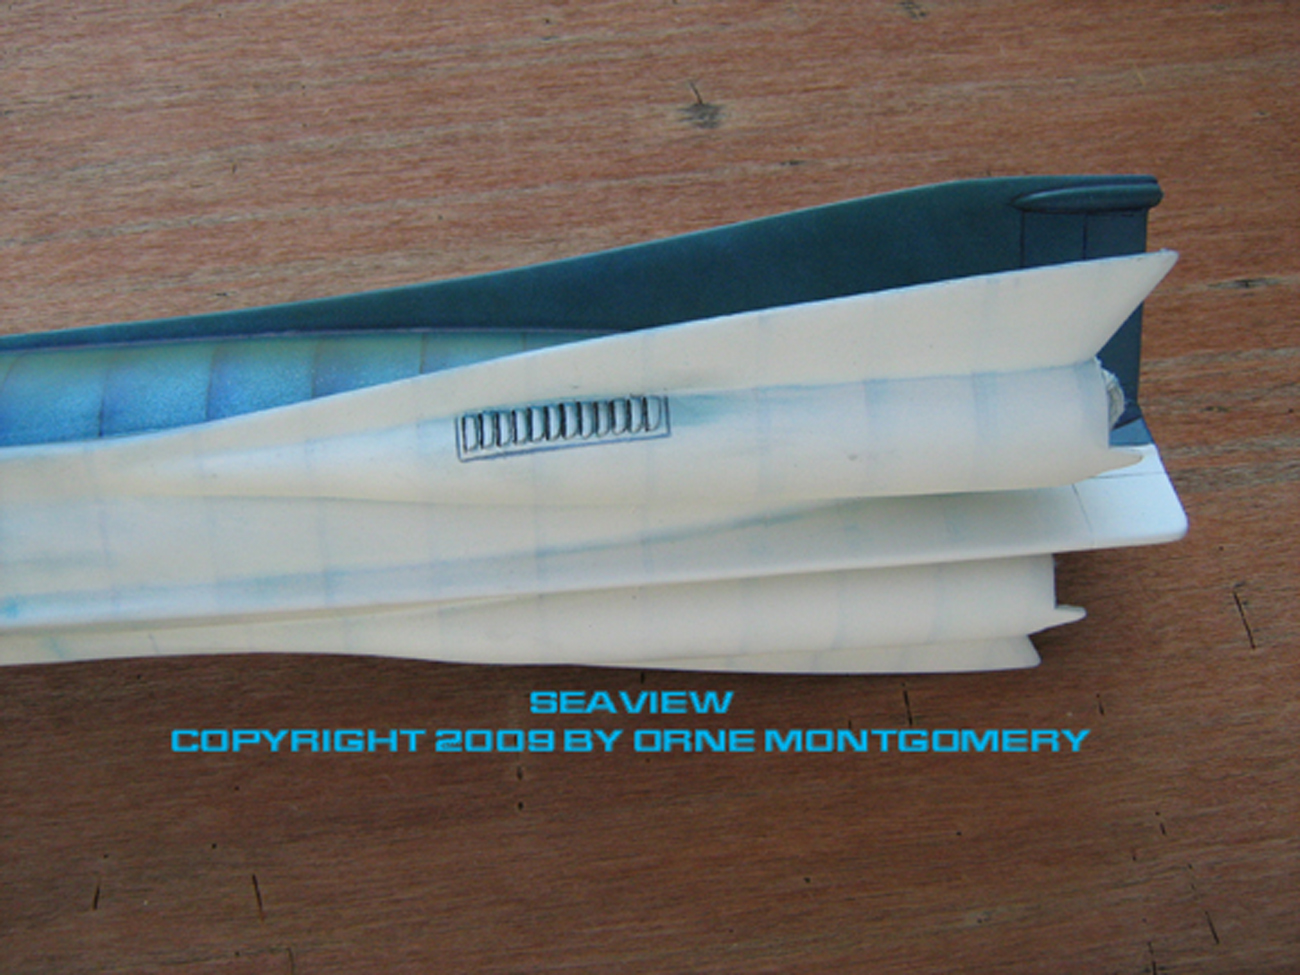
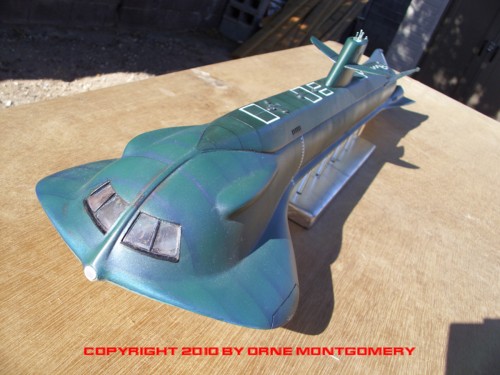
Because most of those ‘limber holes’ made little sense on a modern nuclear boat, I covered most of these with.020 plating, but left exposed two small sets of vents on each flank. Reshaped the leading edge of the tailfins with .060 strips. Widened the pod horizontal fins by half an inch at the rear edge. Six forward and four stern torpedo-hatch covers were added to the lower hull and between the propulsion tubes.
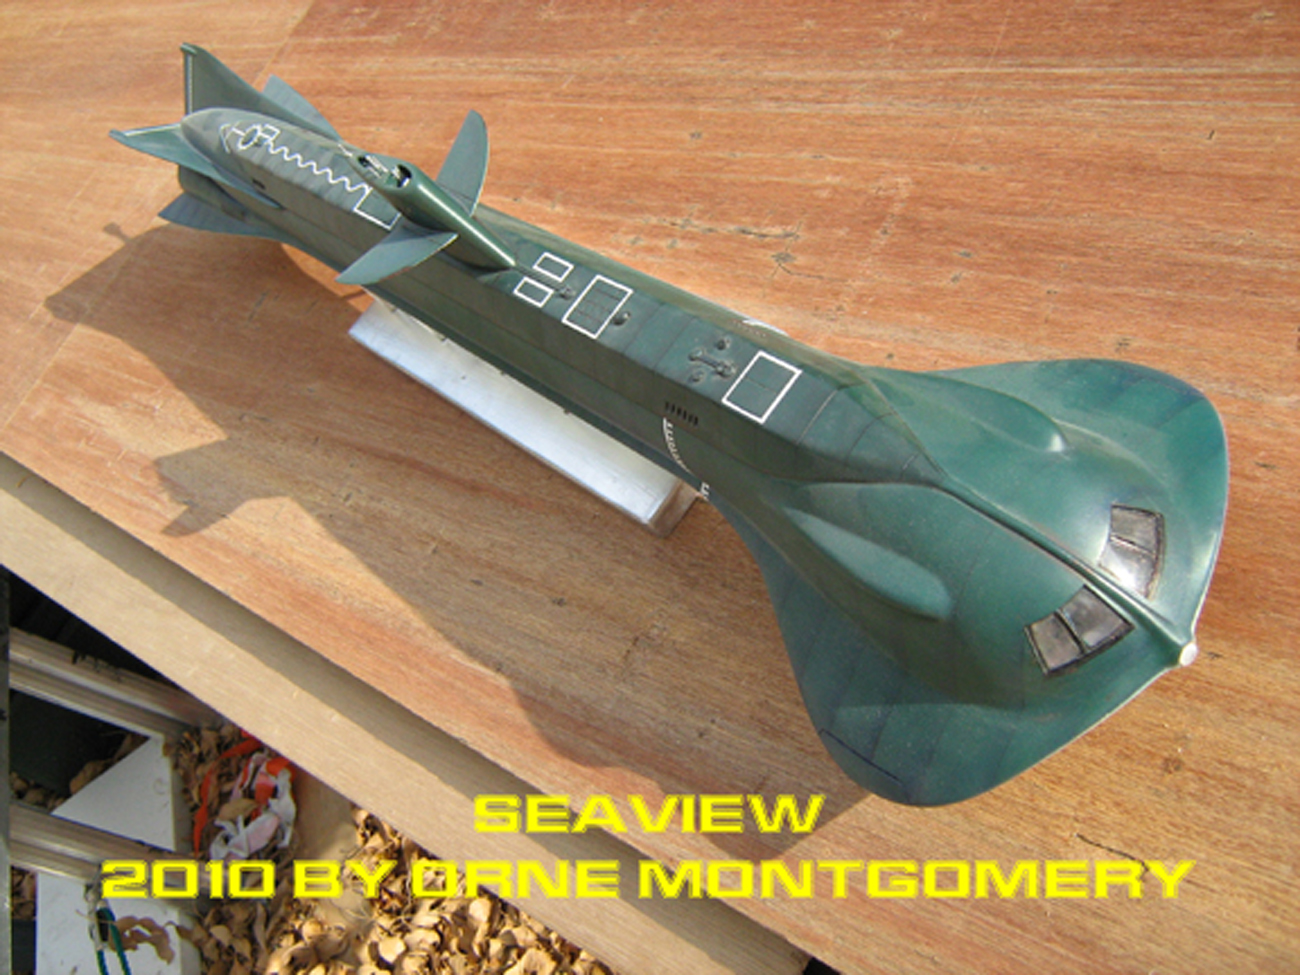
Main hull colors were laid down with ‘station’ demarcations. The topside was feather-blended (i.e. spraybombed over and over again til I liked the coverage) metallic medium blue and pewter, with the deck a contrasting shade of dark metallic grey. Pentel penbrushes and black/white charcoal pencils were drawn on for the station-markings, applied between measured strips of painter tape. The wear along the underside station-markings was pre-shaded with a medium blue penbrush, then lightly oversprayed with flat white and matte clear to seal; above, the markings were done with darker blues and greys. The upper mid-hull was weathered with combinations of grey and dark blue brushpens, blended by fingertip. I masked the mid-hull, and the missile-hatches, then spraybombed the entire deck with another blend of Duplicolor medium blue and Krylon Hunter Green. I used a different spacing for the deck-plating than the hull-stations, and scribed the plating in place; the stations were marked with black gelpen, weathered with combinations of green, brown, red penbrushes. The ‘staining’ from the limber-holes was drybrushed acrylics. Painted/weathered the hatches, etc. with drybrushed acrylics. The area between the tailfins looked a little bare with just the station-markings, so repainted that area and added the panel-detail with pencils, penbrushes, and acrylics; the panels were basically copied from the upper-fuselage panels of an F-16, but tapered to match the angled base of the fins. Added a misty spray coating of green over the deck and upper hull where a combination of sea and air ‘wash’ would rush along the exposed areas of the boat while it’s running on the surface; mostly around the window area which rode above the bow-wave and the demarcation angling rear to the base of the tailfins. Carl Goldberg 1/16″ white trim tape marked the large hatch-edges, etc., and the depth-gage markings on forward hull, sail, and tailfins.
Copyright 2012 by Orne Montgomery